MATE Desktop Environment
Created to fork and continue GNOME2 in the wake of the somewhat negative reception of GNOME3, the MATE desktop environment was born. MATE has loyal followers, who usually immediately install it on their OS of choice. Installation of MATE is possible on many flavors of Linux, including Rocky Linux.
This procedure will get you up and running with MATE on Rocky Linux.
Prerequisites
- A computer (notebook or workstation) with a screen and everything.
- A desire to run the MATE desktop instead of the default GNOME one.
9: Introduction
The development team for Rocky Linux 9 has made installing MATE, and other popular desktop environments, uncomplicated by including live images. For those that might not know what that is, a live image is a bootable image that will load the OS without installation. When loaded, you can install it to your machine's disk drive and use it. In addition to the live image instructions, we have included instructions for those of you who want to install MATE after the installation of the OS.
9: MATE from Live Image
9: Get, Verify, and Write the MATE Live Image
Before installation, the first step is to download the live image and write that to a DVD or a USB thumb drive. As stated earlier, the image will be bootable, just like any other installation media for Linux. You can find the latest MATE image in the download section for Rocky Linux 9 live images. Note this particular link assumes x86_64 as your architecture, and as of this writing that is the only architecture live image available. Download the live image and checksum files.
Verify the image with the CHECKSUM file with the following (note this is an example! Ensure your image name and CHECKSUM files match):
sha256sum -c CHECKSUM --ignore-missing Rocky-9.4-MATE-x86_64-20221124.0.iso.CHECKSUM
If all goes well, you will receive this message:
Rocky-9.4-MATE-x86_64-20221124.0.iso: OK
If the checksum for the file returns OK, you are now ready to write your ISO image to your media. This procedure differs depending on the OS, the media, and the tools. We assume that you know how to write the image to your media.
9: Booting
This again is different by machine, BIOS, OS, and so on. You will need to ensure that your machine is set to boot to whatever your media is (DVD or USB) as the first boot device. If you are successful, you will see this screen:

If so, you are on your way! If you want to test the media, select that option first, or enter S to Start Rocky Linux Mate 9.0.
Remember, this is a live image. It will take some time to boot to the first screen. Do not panic, just wait! When the live image boots up, you will see this screen:
9: Installing MATE
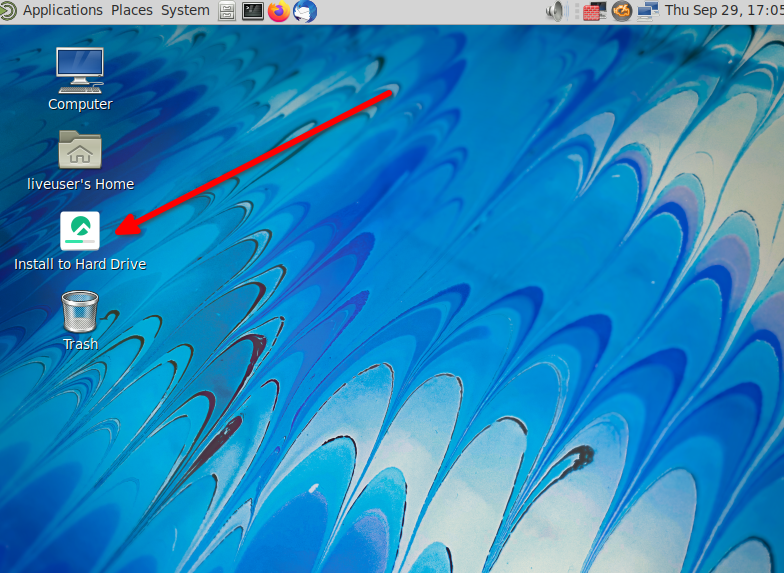
At this point, you can use the MATE environment and see if you like it. When you have decided that you want to use it permanently, double-click the option to Install to Hard Drive.
This will start a pretty familiar installation process for those who have installed Rocky Linux before. In the following screen, we have highlighted things that you may want to change.
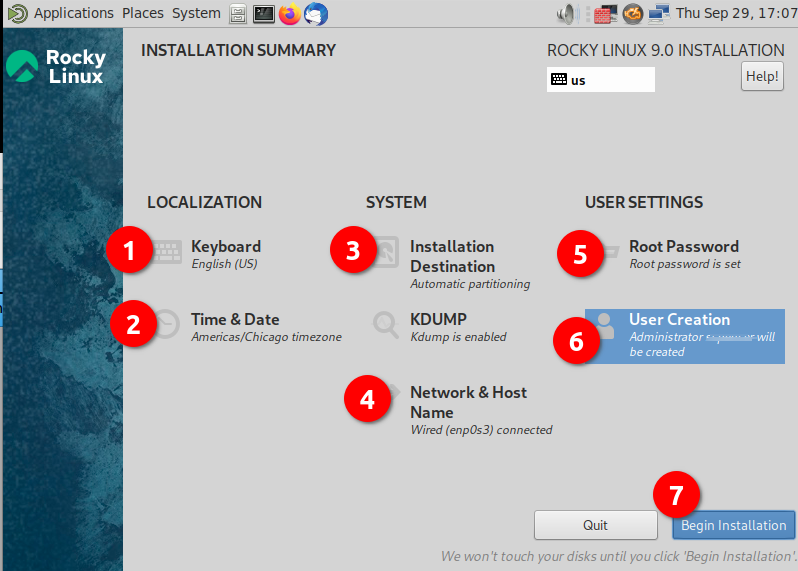
- Keyboard - Ensure that it matches up to the keyboard layout that you use.
- Time & Date - Ensure this matches up to your time zone.
- Installation Destination - You will need to click into this option, even if it is just to accept what is already there.
- Network & Host Name - Verify that you have what you want here. Provided the network is enabled, you can always change this later if you need to.
- Root Password - Set a root password. Remember to save this somewhere safe (password manager).
- User Creation - Create at least one user. If you want the user to have administrative rights, set this option when creating the user.
- Begin Installation - When all of the settings have been set or verified, click this option.
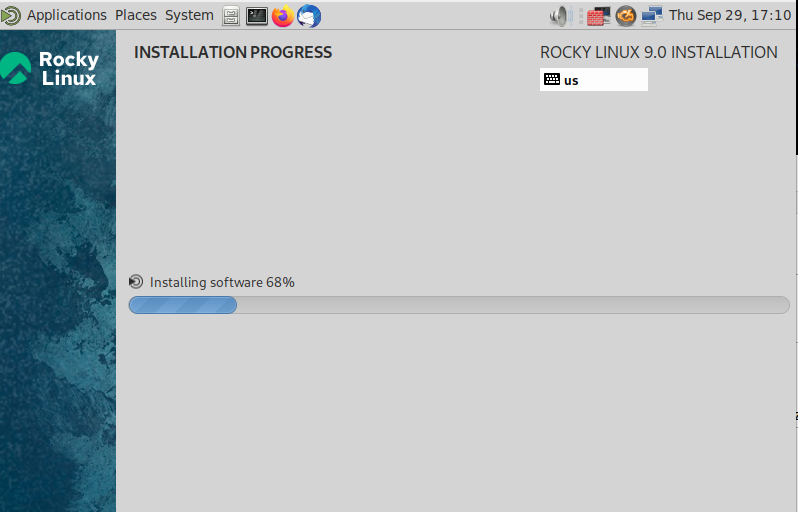
When you do step 7, the installation process will start installing packages, as in this screenshot:
After the installation to the hard disk finishes, you will see the following screen:
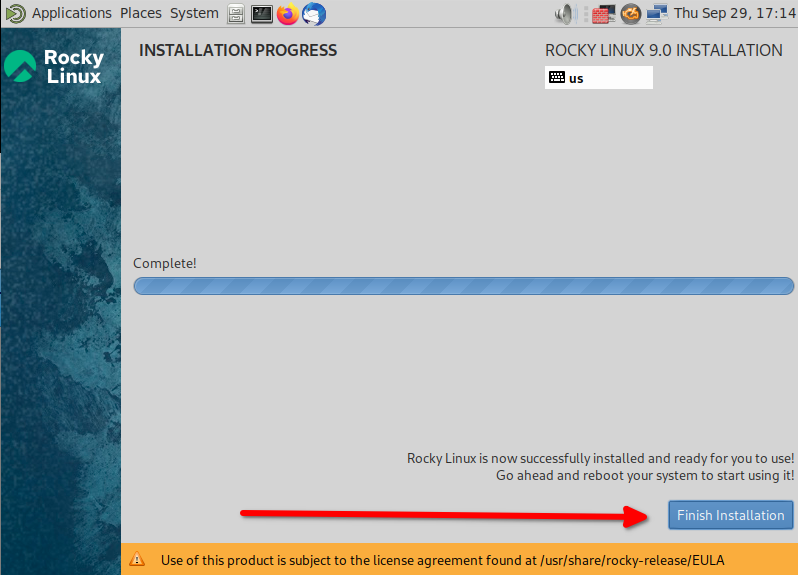
Click Finish Installation.
At this point the OS will reboot. Remove your boot media and when the OS comes up for the first time, there is a licensing agreement screen:
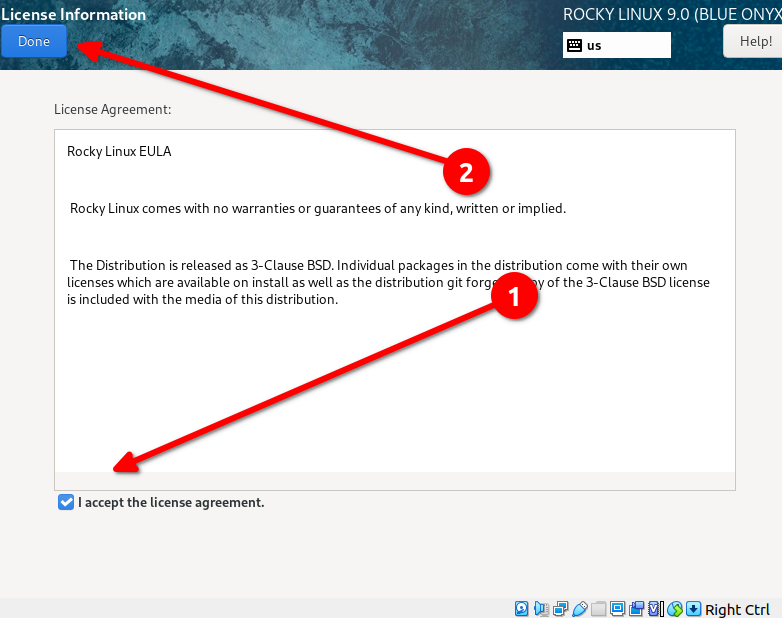
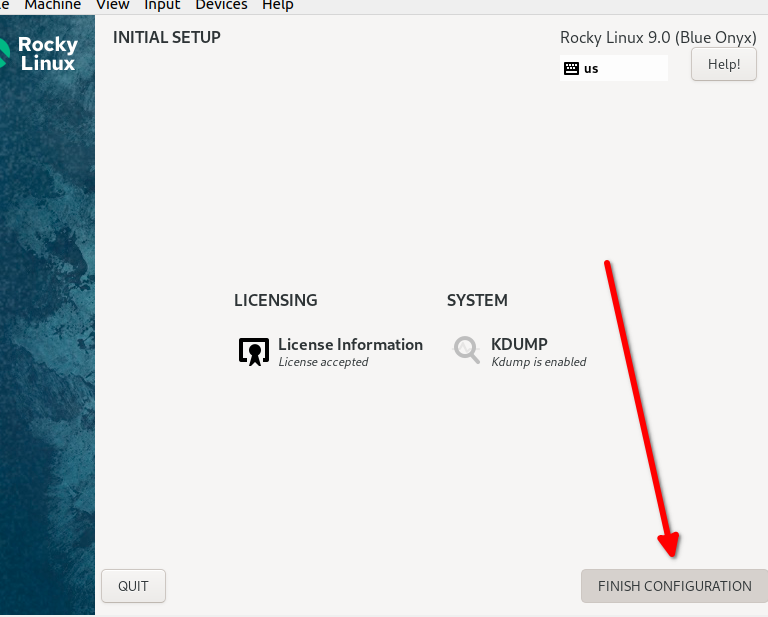
Click the I accept the license agreement check box, and click Done. This will get you to the final screen in the installation. On this screen, click Finish Configuration.
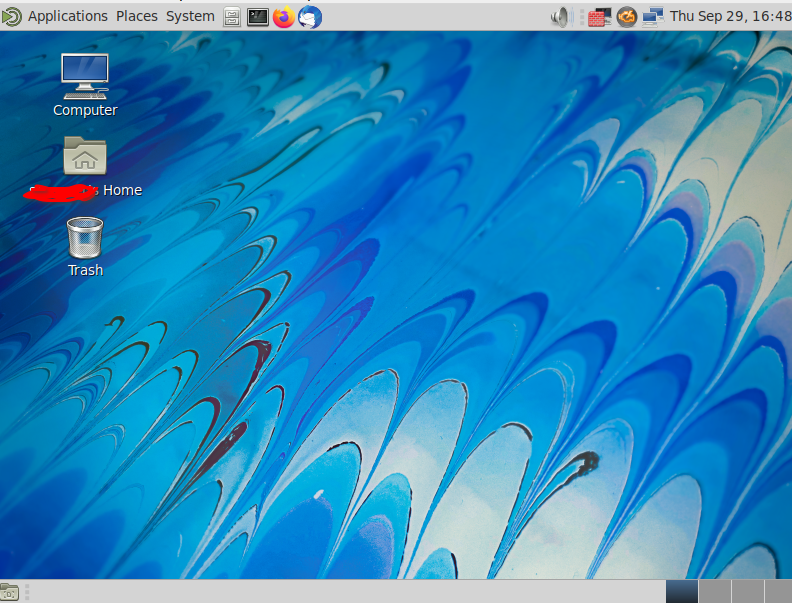
Next you will get a login screen with the user you created. Enter your password, which will get you to the MATE desktop:
9: MATE after OS Install
Installing MATE after the OS installation is also possible. This takes a few more steps, but is not a difficult process. Just follow these instructions.
9: Enabling Repositories
You need the CRB repository and the EPEL repository. Enable those now:
sudo dnf config-manager --set-enabled crb
sudo dnf install epel-release
Run dnf upgrade to ensure all the enabled repositories read into the system.
9: Installing Packages
The next thing you need is many packages. You can install these by copying and pasting the following into the command line on your machine:
sudo dnf install NetworkManager-adsl NetworkManager-bluetooth NetworkManager-libreswan-gnome NetworkManager-openvpn-gnome NetworkManager-ovs NetworkManager-ppp NetworkManager-team NetworkManager-wifi NetworkManager-wwan adwaita-gtk2-theme alsa-plugins-pulseaudio atril atril-caja atril-thumbnailer caja caja-actions caja-image-converter caja-open-terminal caja-sendto caja-wallpaper caja-xattr-tags dconf-editor engrampa eom firewall-config gnome-disk-utility gnome-epub-thumbnailer gstreamer1-plugins-ugly-free gtk2-engines gucharmap gvfs-fuse gvfs-gphoto2 gvfs-mtp gvfs-smb initial-setup-gui libmatekbd libmatemixer libmateweather libsecret lm_sensors marco mate-applets mate-backgrounds mate-calc mate-control-center mate-desktop mate-dictionary mate-disk-usage-analyzer mate-icon-theme mate-media mate-menus mate-menus-preferences-category-menu mate-notification-daemon mate-panel mate-polkit mate-power-manager mate-screensaver mate-screenshot mate-search-tool mate-session-manager mate-settings-daemon mate-system-log mate-system-monitor mate-terminal mate-themes mate-user-admin mate-user-guide mozo network-manager-applet nm-connection-editor p7zip p7zip-plugins pluma seahorse seahorse-caja xdg-user-dirs-gtk
This will install these needed packages plus all of the dependencies.
Install lightdm-settings and lightdm also:
sudo dnf install lightdm-settings lightdm
9: Final Steps
If your system had Gnome or another desktop installed before installing MATE, you should be ready to reboot at this time. If there was no desktop installation in existence, you will need to use the following command to set the graphical target:
sudo systemctl set-default graphical.target
Then reboot
sudo reboot
When the system reboots, click on your user name, but before you enter your password, click on the gear icon in the lower right of the screen and select MATE from the desktop list. Login and you should have a fully functional MATE desktop. Future logins should remember your selection.
8: Install Rocky Linux Minimal
When installing Rocky Linux, we used the following sets of packages:
- Minimal
- Standard
8: Enabling Repositories
You need the Powertools repository and the EPEL repository. Enable those now:
sudo dnf config-manager --set-enabled powertools
sudo dnf install epel-release
And answer 'Y' to install the EPEL repository.
Run dnf update to ensure all of the enabled repositories are read into the system.
8: Installing Packages
The next thing you need many packages. You can install these by copying and pasting the following into the command line on your machine:
sudo dnf install NetworkManager-adsl NetworkManager-bluetooth NetworkManager-libreswan-gnome NetworkManager-openvpn-gnome NetworkManager-ovs NetworkManager-ppp NetworkManager-team NetworkManager-wifi NetworkManager-wwan abrt-desktop abrt-java-connector adwaita-gtk2-theme alsa-plugins-pulseaudio atril atril-caja atril-thumbnailer caja caja-actions caja-image-converter caja-open-terminal caja-sendto caja-wallpaper caja-xattr-tags dconf-editor engrampa eom firewall-config gnome-disk-utility gnome-epub-thumbnailer gstreamer1-plugins-ugly-free gtk2-engines gucharmap gvfs-afc gvfs-afp gvfs-archive gvfs-fuse gvfs-gphoto2 gvfs-mtp gvfs-smb initial-setup-gui libmatekbd libmatemixer libmateweather libsecret lm_sensors marco mate-applets mate-backgrounds mate-calc mate-control-center mate-desktop mate-dictionary mate-disk-usage-analyzer mate-icon-theme mate-media mate-menus mate-menus-preferences-category-menu mate-notification-daemon mate-panel mate-polkit mate-power-manager mate-screensaver mate-screenshot mate-search-tool mate-session-manager mate-settings-daemon mate-system-log mate-system-monitor mate-terminal mate-themes mate-user-admin mate-user-guide mozo network-manager-applet nm-connection-editor p7zip p7zip-plugins pluma seahorse seahorse-caja xdg-user-dirs-gtk
This will install these needed packages plus all of the dependencies.
Install lightdm-settings and lightdm as well:
sudo dnf install lightdm-settings lightdm
8: Final Steps
Now that you have everything you need installed, you next must set the minimal install to boot into the Graphical User Interface (GUI). We can do this by entering:
sudo systemctl set-default graphical.target
Now just keep your fingers crossed and reboot:
sudo reboot
Next, click on your username on the screen, but before you enter your password and login, click on the gear icon to the left of the "Sign in" option. Select "MATE" from the available desktop choices and then enter your password and login. Future logins will remember your selection.
Conclusion
Some people are not satisfied with the newer GNOME implementations or just prefer the older MATE GNOME 2 look and feel. Getting MATE installed in Rocky Linux will provide a friendly, stable alternative. For Rocky Linux 9.0, the developers have made the whole process very simplistic with the available live image.
Author: lillolollo, Steven Spencer
Contributors: Steven Spencer, Serge, Ganna Zhyrnova