Environnement de bureau MATE
Créé comme un fork et une continuation de GNOME2 à la suite de l'accueil plutôt négatif de GNOME3, l'environnement de bureau MATE était né. MATE a un ensemble fidèle de followers, qui l'installent immédiatement sur l'OS de leur choix. MATE peut être installé sur de nombreuses variantes de GNU/Linux, y compris Rocky Linux.
Cette procédure vous permettra d'utiliser MATE sur Rocky Linux.
Prérequis
- Un ordinateur (ordinateur portable ou station de travail) avec écran et tout.
- Un désir d'exécuter l'environnement de bureau MATE au lieu de GNOME, celui par défaut.
9: Introduction
L'équipe de développement de Rocky Linux 9 a facilité l'installation de MATE et d'autres environnements de bureau populaires, en incluant des images de live CD. Une image d'installation autonome, pour ceux qui ne savent peut-être pas ce que c'est, est une image amorçable qui chargera le système d'exploitation sans installation. Une fois chargée, vous avez la possibilité de l'installer sur le disque dur de votre machine et de l'utiliser. En plus des instructions pour l'image live, nous avons inclus des instructions pour ceux qui souhaitent installer MATE seulement après avoir installé le système d'exploitation.
9: MATE à partir de l' Image Live
9: obtenir, vérifier et enregistrer la l'image live MATE
Avant l'installation, la première étape consiste à télécharger l'image live et à l'écrire sur un DVD ou une clé USB. Comme indiqué précédemment, l'image autonome sera amorçable, tout comme tout autre support d'installation pour Linux. Vous trouverez la dernière image live pour MATE dans la section Download pour Rocky Linux 9 images live. Notez que ce lien particulier suppose que x86_64 est votre architecture, et au moment de la rédaction de cet article, qui est la seule architecture pour laquelle cette image d'installation autonome est disponible. Téléchargez à la fois l'image live et les fichiers de vérification correspondants.
Maintenant vérifiez l'image avec le fichier CHECKSUM en utilisant la commande suivante (notez qu'il s'agit d'un exemple ! Assurez-vous que le nom de votre image et les fichiers CHECKSUM correspondent) :
sha256sum -c CHECKSUM --ignore-missing Rocky-9.5-MATE-x86_64-20221124.0.iso.CHECKSUM
Si tout se passe bien, vous devriez obtenir ce message :
Rocky-9.5-MATE-x86_64-20221124.0.iso: OK
Si la somme de contrôle du fichier retourne OK, vous êtes maintenant prêt à enregistrer votre image ISO sur votre support de stockage. Cette procédure est différente suivant l'OS que vous utilisez, les supports de stockage et les outils logiciels. Nous supposons ici que vous savez écrire l'image sur votre support de stockage.
9: Démarrage
Ceci est différent suivant le matériel, le BIOS, OS, etc. Vous devez vous assurer que votre machine est configurée pour démarrer avec n'importe quel support (DVD ou USB) comme premier périphérique de démarrage. Si l'opération a réussi, cet écran apparaîtra :

Si c'est le cas, vous êtes sur la bonne voie ! Si vous souhaitez tester la prise en charge, sélectionnez d'abord cette option ou entrez S pour Démarrer Rocky Linux Mate 9.0.
N'oubliez pas qu'il s'agit d'une image live. Le lancement jusqu'au premier écran prend un certain temps. Pas de panique, il suffit d'attendre ! Lorsque l'image live est lancée, cet écran apparaît :
9: Installing MATE
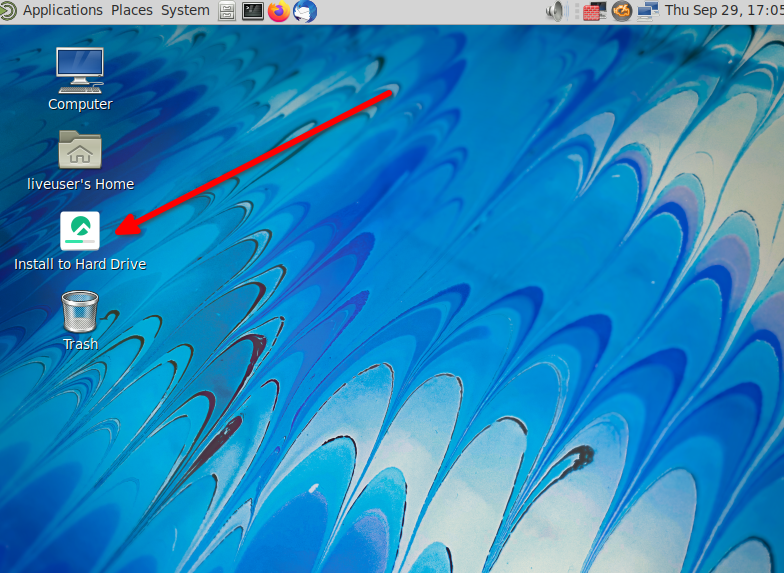
À ce stade, nous pouvons utiliser l'environnement MATE et voir s'il nous convient. Une fois que vous avez décidé de l'utiliser de manière permanente, double-cliquez sur l'option Install to hard drive.
Cela lancera un processus d'installation assez familier pour ceux qui ont déjà installé Rocky Linux. La capture d'écran suivante met en évidence les éléments que vous pourriez vouloir modifier.
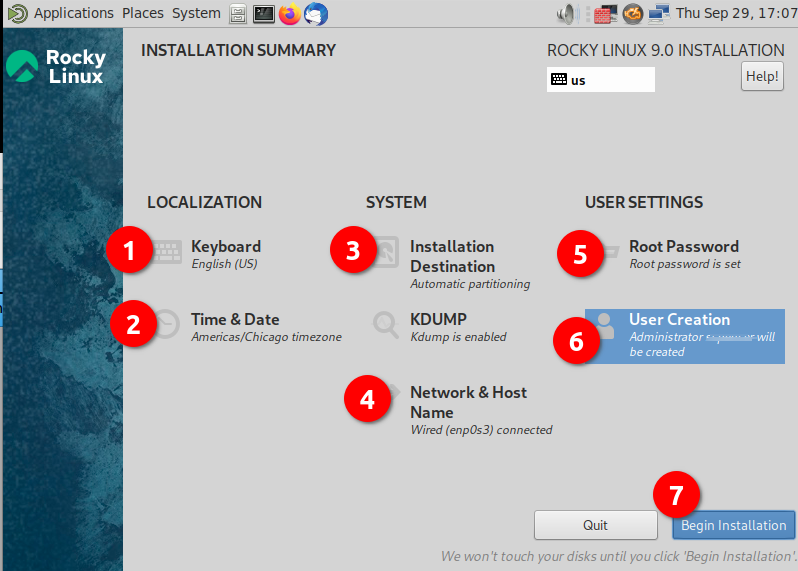
- Clavier - Jetez un coup d'œil à cette option et assurez-vous qu'elle correspond bien à la disposition du clavier que vous utilisez.
- Heure & Date - Assurez-vous que cela correspond à votre fuseau horaire.
- Destination d'installation - Vous devrez cliquer sur cette option, même si c'est juste pour accepter ce qui est déjà indiqué.
- Réseau & Nom d'Hôte - Vérifiez que vous avez ce dont vous avez besoin ici. Tant que le réseau est activé, vous pouvez toujours modifier plus tard si vous le souhaitez.
- Mot de passe root - Allez-y et choisissez un mot de passe root. N'oubliez pas de sauvegarder ce mot de passe dans un endroit sûr (gestionnaire de mots de passe par ex.).
- Création d'utilisateur - Créez au moins un utilisateur. Si vous voulez qu'il dispose de droits d'administration, n'oubliez pas de définir cette option lors de la création de l'utilisateur.
- Commencer l'installation - Une fois que tous les paramètres ont été définis ou vérifiés, continuez en cliquant sur cette option.
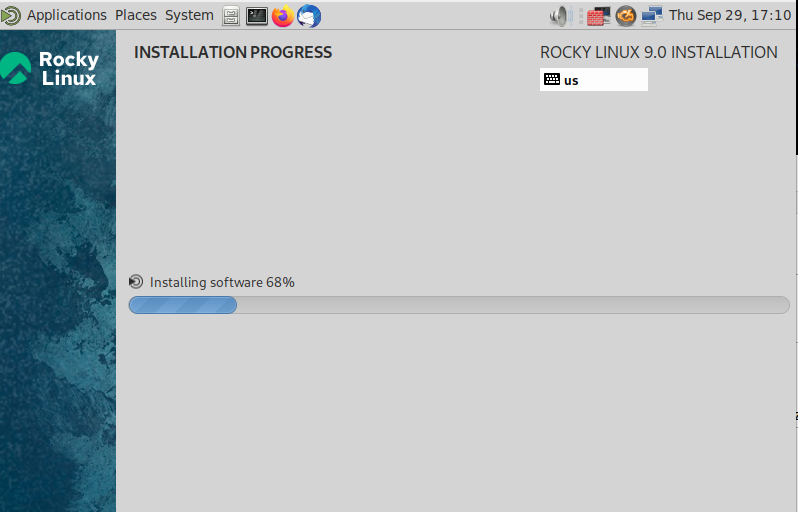
Une fois que vous avez terminé avec l'étape 7, le processus d'installation devrait commencer à installer des paquets, tout comme le montre la capture d'écran ci-dessous :
Une fois l'installation sur le disque dur terminée, vous devriez voir l'écran suivant :
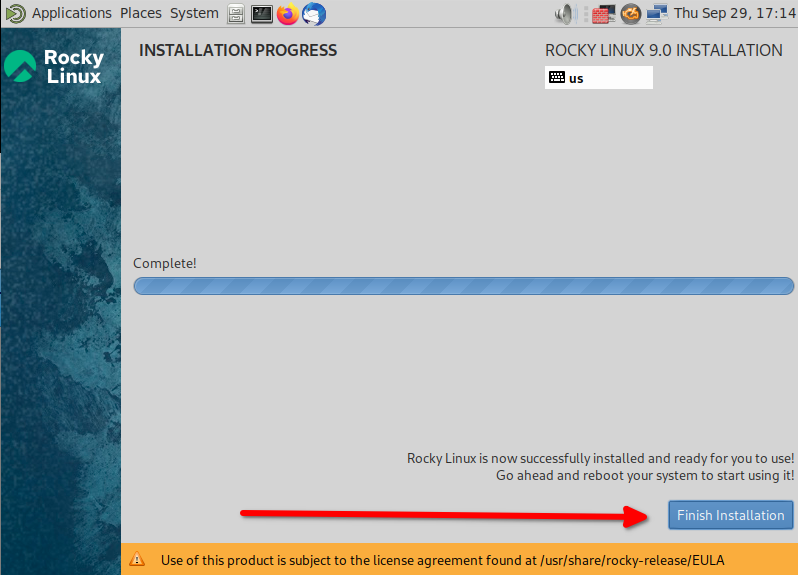
Allez-y et cliquez sur Terminer l'installation.
À ce stade, l'OS va redémarrer. Retirez le media de démarrage et lorsque le système d'exploitation démarre pour la première fois, un écran apparaît avec un contrat de licence :
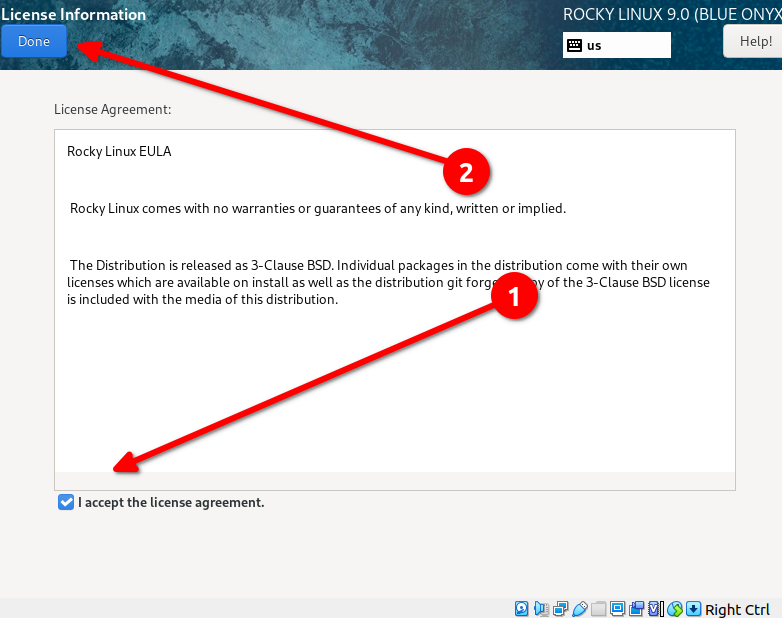
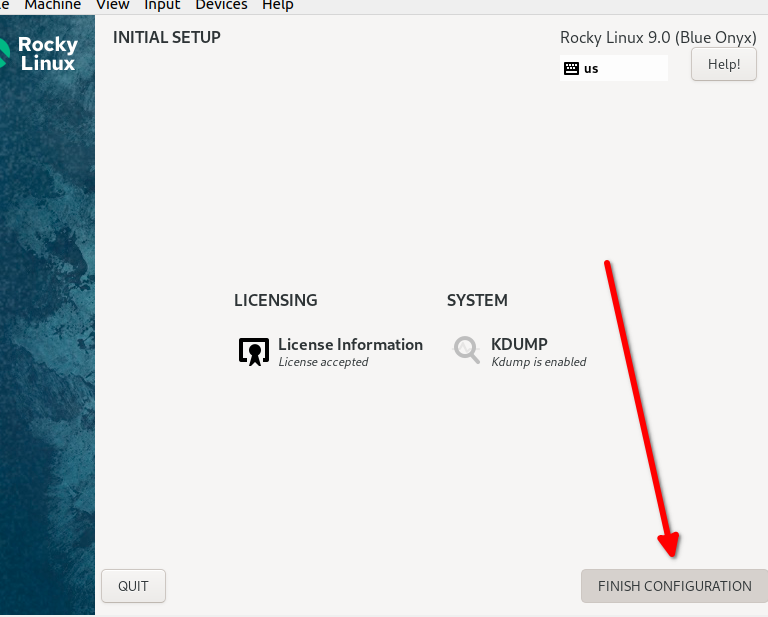
Cliquez sur la case à cocher J'accepte l'accord de licence puis cliquez sur Terminé. Cela vous mènera à l'écran final en ce qui concerne l'installation. Sur cet écran, cliquez sur Terminer la configuration.
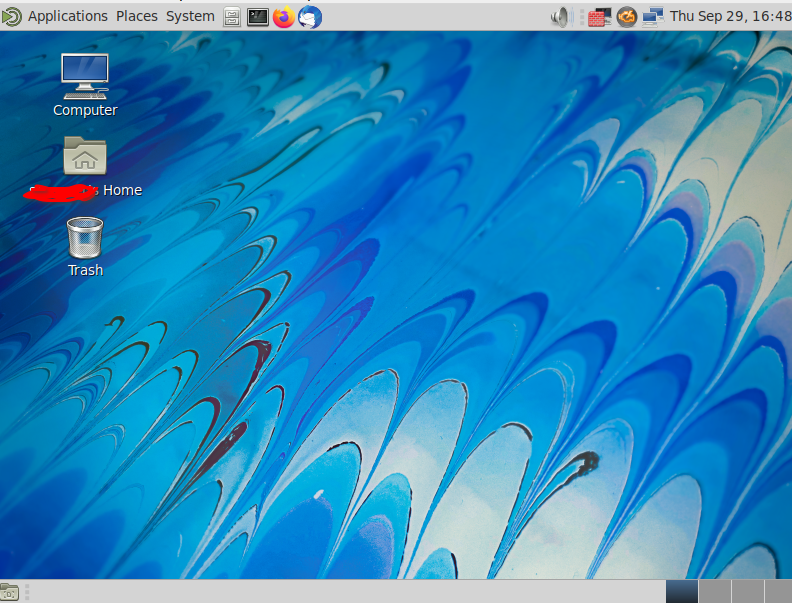
Ensuite, vous obtiendrez un écran de connexion avec l'utilisateur que vous avez créé précédemment. Saisissez votre mot de passe, qui vous mènera au bureau MATE :
9: MATE après l'installation du système
MATE peut également être installé seulement après l'installation du système d'exploitation. Cela nécessite quelques étapes supplémentaires, mais ce n'est pas un processus très difficile. Suivez simplement les instructions qui suivent.
9: Activation des dépôts
Vous aurez besoin des dépôts CRB et EPEL. Activez-les ainsi :
sudo dnf config-manager --set-enabled crb
sudo dnf install epel-release
Allez-y et exécutez dnf upgrade pour vous assurer que tous les dépôts activés sont accessibles dans le système.
9: Installation des paquets
La prochaine chose dont nous avons besoin sont de nombreux paquets. Vous pouvez les installer en copiant et en collant ce qui suit dans la ligne de commande de votre machine :
sudo dnf install NetworkManager-adsl NetworkManager-bluetooth NetworkManager-libreswan-gnome NetworkManager-openvpn-gnome NetworkManager-ovs NetworkManager-ppp NetworkManager-team NetworkManager-wifi NetworkManager-wwan adwaita-gtk2-theme alsa-plugins-pulseaudio atril atril-caja atril-thumbnailer caja caja-actions caja-image-converter caja-open-terminal caja-sendto caja-wallpaper caja-xattr-tags dconf-editor engrampa eom firewall-config gnome-disk-utility gnome-epub-thumbnailer gstreamer1-plugins-ugly-free gtk2-engines gucharmap gvfs-fuse gvfs-gphoto2 gvfs-mtp gvfs-smb initial-setup-gui libmatekbd libmatemixer libmateweather libsecret lm_sensors marco mate-applets mate-backgrounds mate-calc mate-control-center mate-desktop mate-dictionary mate-disk-usage-analyzer mate-icon-theme mate-media mate-menus mate-menus-preferences-category-menu mate-notification-daemon mate-panel mate-polkit mate-power-manager mate-screensaver mate-screenshot mate-search-tool mate-session-manager mate-settings-daemon mate-system-log mate-system-monitor mate-terminal mate-themes mate-user-admin mate-user-guide mozo network-manager-applet nm-connection-editor p7zip p7zip-plugins pluma seahorse seahorse-caja xdg-user-dirs-gtk
Cela installera ces paquets nécessaires ainsi que tous ceux dont ils dépendent.
Ensuite installons aussi lightdm-settings et lightdm :
sudo dnf install lightdm-settings lightdm
9: Étapes Finales
Si votre système a été installé avec GNOME ou un autre interface de bureau avant d'installer MATE, vous devriez vous préparer à redémarrer le système. Si aucune interface de bureau n'a été installée, vous devrez utiliser la commande suivante pour définir la cible graphique :
sudo systemctl set-default graphical.target
Puis redémarrez le système
sudo reboot
Lorsque le système redémarre, cliquez sur votre nom d'utilisateur, mais avant d'entrer le mot de passe, cliquez sur l'icône d'engrenage en bas à droite de l'écran et sélectionnez MATE dans la liste des interfaces. Ensuite, connectez-vous et vous devriez avoir un environnement de bureau MATE entièrement fonctionnel. Les prochaines connexions devraient utiliser automatiquement la sélection choisie.
sudo dnf install epel-release
Et répondez 'Y' pour installer le dépôt EPEL.

Allez-y et exécutez `dnf update` pour vous assurer que tous les dépôts activés sont accessibles dans le système.


## 8: Installation des Paquets

La prochaine chose dont nous avons besoin consiste en de nombreux paquets. Vous pouvez les installer en copiant et en collant ce qui suit dans la ligne de commande de votre machine :
Cela installera les paquets nécessaires ainsi que toutes leurs dépendances.

Continuons et installons lightdm-settings ainsi que lightdm :
## 8: Étapes finales

Maintenant que nous avons installé tout ce dont nous avons besoin, la prochaine chose que nous devons faire est de définir l'installation minimale pour démarrer avec l'interface graphique (GUI). Nous pouvons le faire en entrant la commande :
Maintenant, croisez les doigts et redémarrez le système :
Ensuite, cliquez sur votre nom d'utilisateur à l'écran, mais avant d'entrer votre mot de passe et de vous connecter, cliquez sur l’icône d’engrenage à gauche de l’option « Sign in ». Sélectionnez "MATE" dans les choix de desktop disponibles et vous pourrez ensuite entrer votre mot de passe et vous connecter. Les prochaines connexions devraient utiliser automatiquement la sélection choisie.
Conclusion
Certaines personnes ne sont pas satisfaites des nouvelles implémentations de GNOME ou préfèrent tout simplement l'apparence et l'ergonomie de l'ancien MATE GNOME 2. Pour ces personnes, installer MATE dans Rocky Linux offre une alternative stable et agréable. Les développeurs de Rocky Linux 9 ont rendu tout le processus très facile avec l'image live disponible.
Author: lillolollo, Steven Spencer
Contributors: Steven Spencer, Ganna Zhyrnova