NvChad Interface
A few words about mappings.lua
Throughout NvChad's official documentation, commands such as <leader> are mentioned, along with other keys that might not be understandable to the casual reader. The reason for this is the default mappings.lua file (../nvim/lua/core/mappings.lua).
This file and the key mappings it describes are outlined here. To be clear, you can override any key mappings using a custom mappings.lua file (../nvim/lua/custom/mappings.lua).
To avoid confusion in the documents you are now reading, we are going to assume that you are using the default mappings.lua file and will substitute in the actual commands that you need to use to access a function. Standard key references are:
- leader = Space
- A = Alt
- C = Ctrl
- S = Shift
If a command would specify <leader>uu as an example, we will substitute in the actual key combination of Spaceuu.
This will be covered again in the next section Using NvChad
Once Neovim is installed and the NvChad configuration is entered, our IDE should look like this:
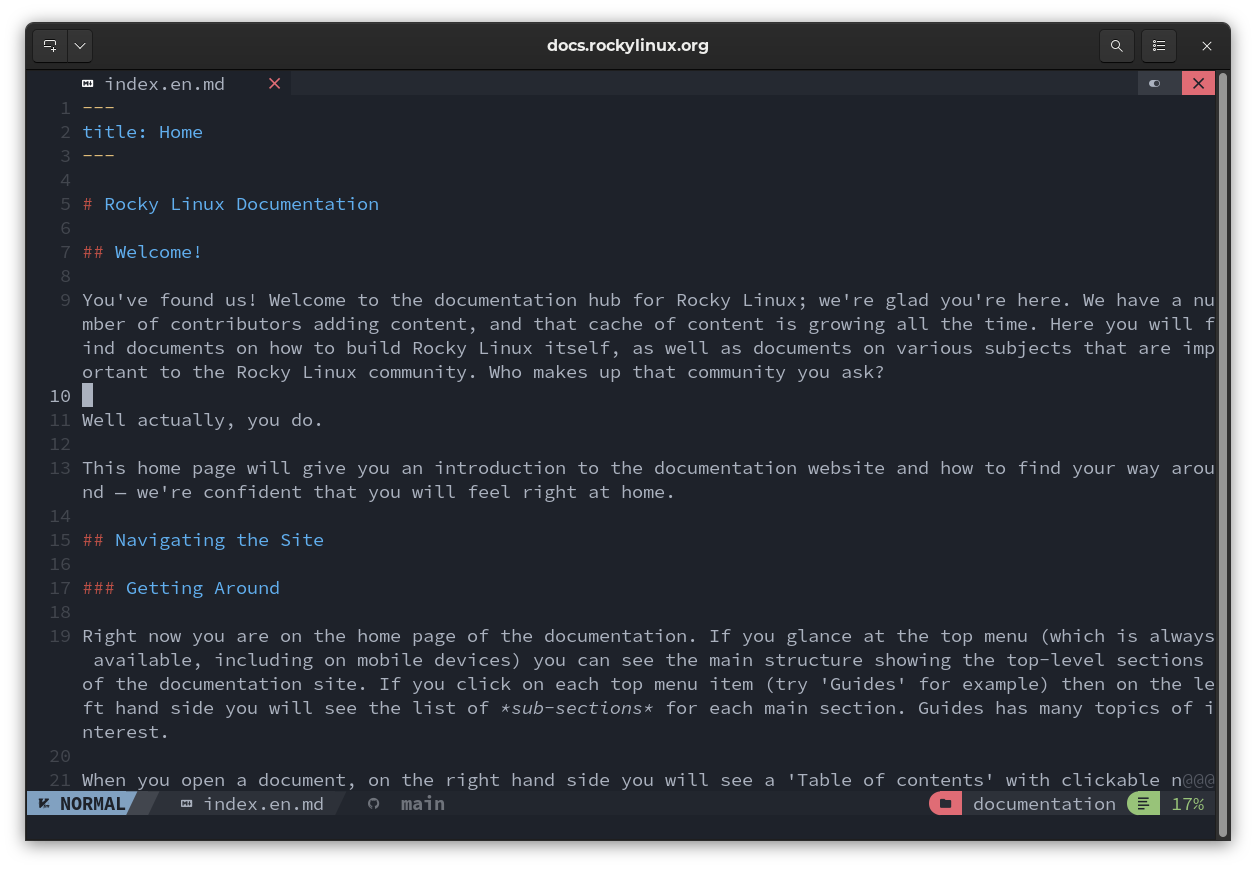
The interface already comes with some advanced functionality, such as indicating the status of the git repository, but can be further enhanced by using the Language Server, and customized by overriding some basic configurations. The basic modules that make it up are detailed below.
Tabufline

The user interface presents a top bar called Tabufline where the open buffers are managed. Tabufline only shows if you have more than one file open. The open buffer presents the file type icon, the file name, and its status. Status is indicated with an icon.
If, as in the screenshot, we have a red x, it means that the file can be closed as it is already saved. If instead the icon is a green dot ., then the file needs to be saved, and a close command Shift + : + q will produce a warning: "No write since last change".
To the right is the icon for setting the dark or light theme. By clicking on it with the mouse, we can select the theme we want.
On the right we also have the icon for closing our editor.
Middle Section - Open Buffers
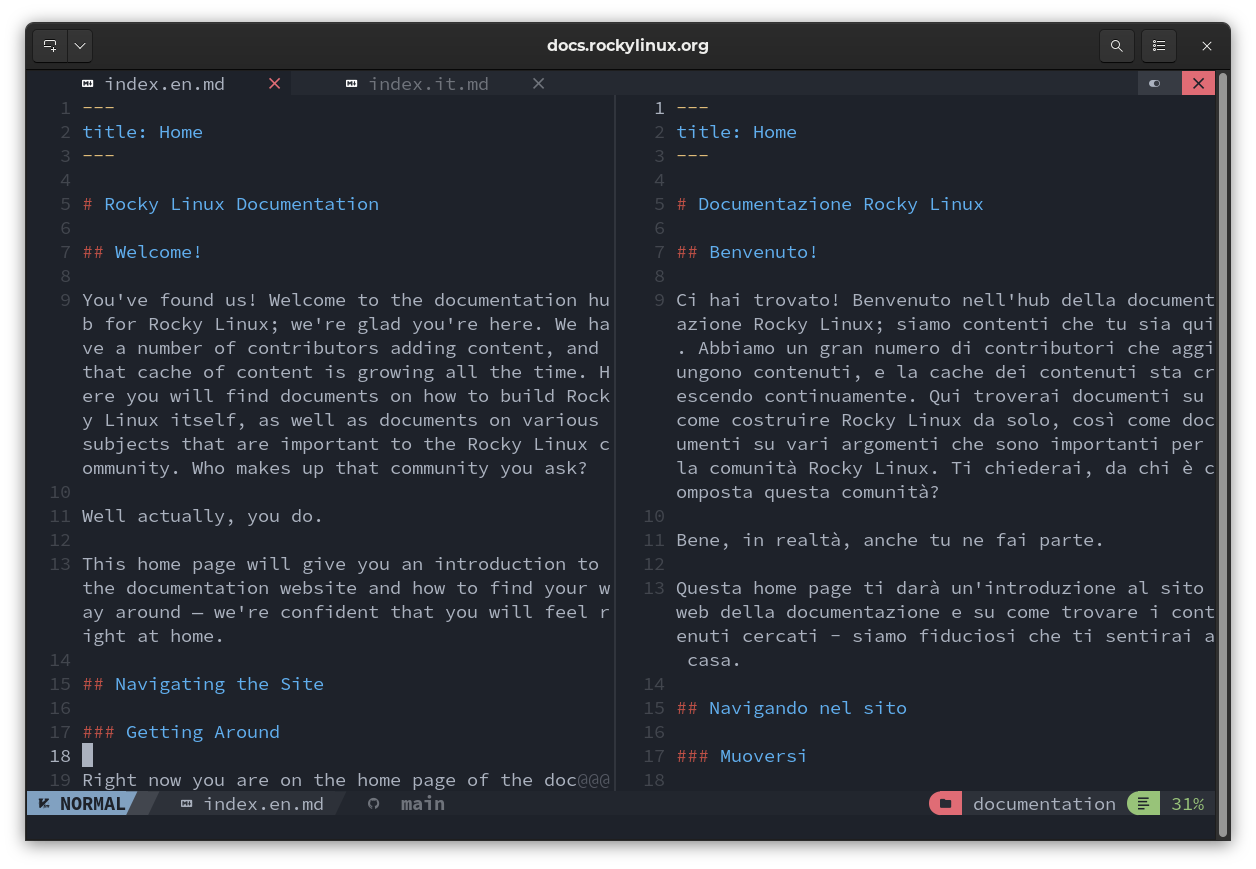
The central part of the editor is composed of the buffer active on the editor at that moment (index.en.md). To introduce some additional functionality, we can work simultaneously on two files in a split buffer by opening one more in the example (index.it.md).
In the editor we will have the first buffer in the foreground and the second one listed in the Tabufline. Now if we split the first buffer with the Shift + : + vsplit command and select the right buffer, clicking on the name of the second file (index.it.md) in the tabufline, this will be opened in the right buffer and we can work with the two files side by side.
Statusline

At the bottom we find the Statusline, which handles status information. On the right we find the editor status. We must not forget that we are using a text editor and that, in particular, it maintains the philosophy and operation of Vim. The possible states are:
- NORMAL
- INSERT
- COMMAND
- VISUAL
Editing a document starts from the NORMAL mode where you open the file, then you can switch to INSERT mode for editing, and when finished exit with Esc and return to NORMAL mode.
Now to save the file you switch to COMMAND mode by typing : in the statusline followed by w (write) to write it and with Esc you return to NORMAL mode. The status indication is very useful while learning how to use it, particularly if one is not very familiar with the Vim workflow.
We then find the name of the open file, and if we are working on a git repository, we will have indications of the status of the repository. This is thanks to the lewis6991/gitsigns.nvim plugin.
Turning to the right side we find the name of the folder from which we opened the editor. In the case of the use of LSPs, this indicates the folder that is taken into account as workspace, and consequently evaluated during diagnostics, and to follow the position of the cursor within the file.
Integrated Help
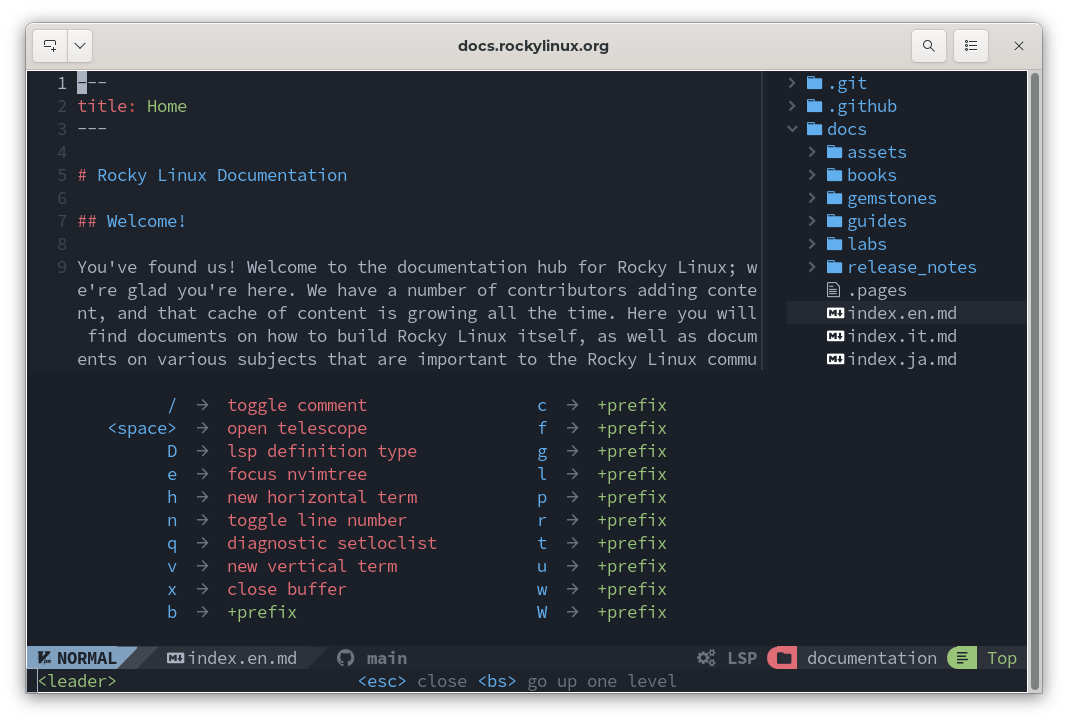
NvChad and Neovim provide some useful commands for displaying preset key combinations and available options.
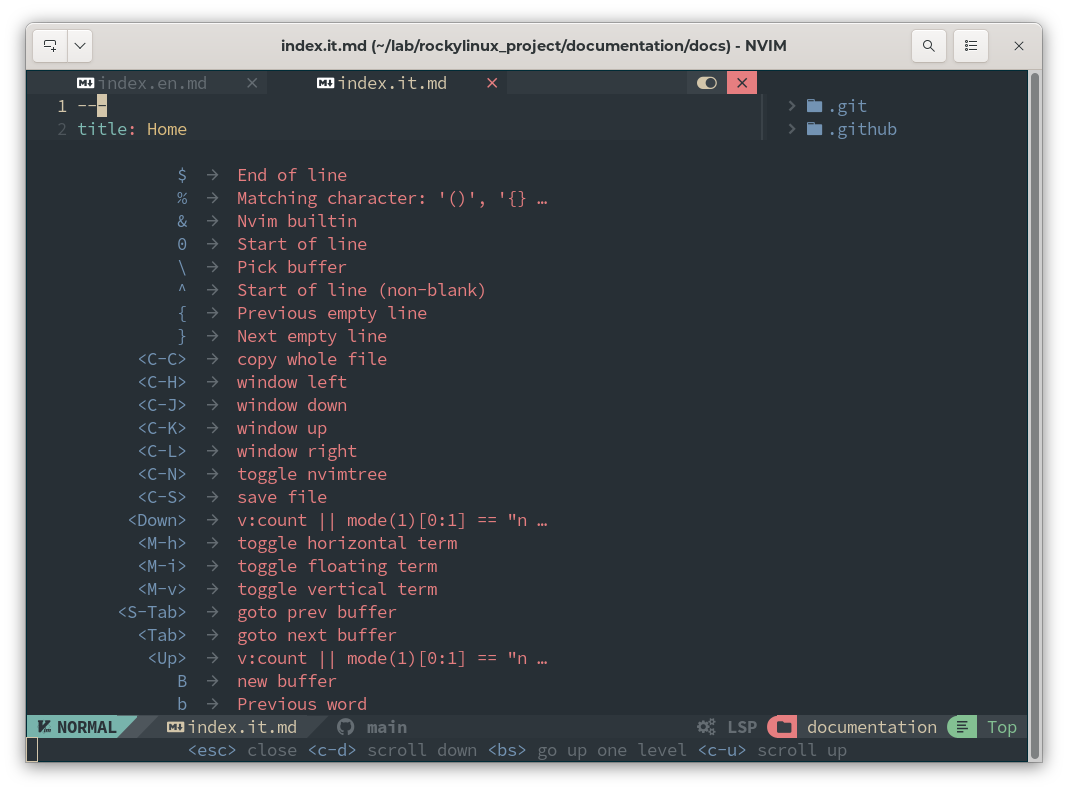
If the Space key is pressed alone, it will provide a legend of associated commands as in the following screenshot:
To view all the commands included in the editor we can use the Space + wK command, which will give the following result:
And by pressing d we can display the remaining commands:
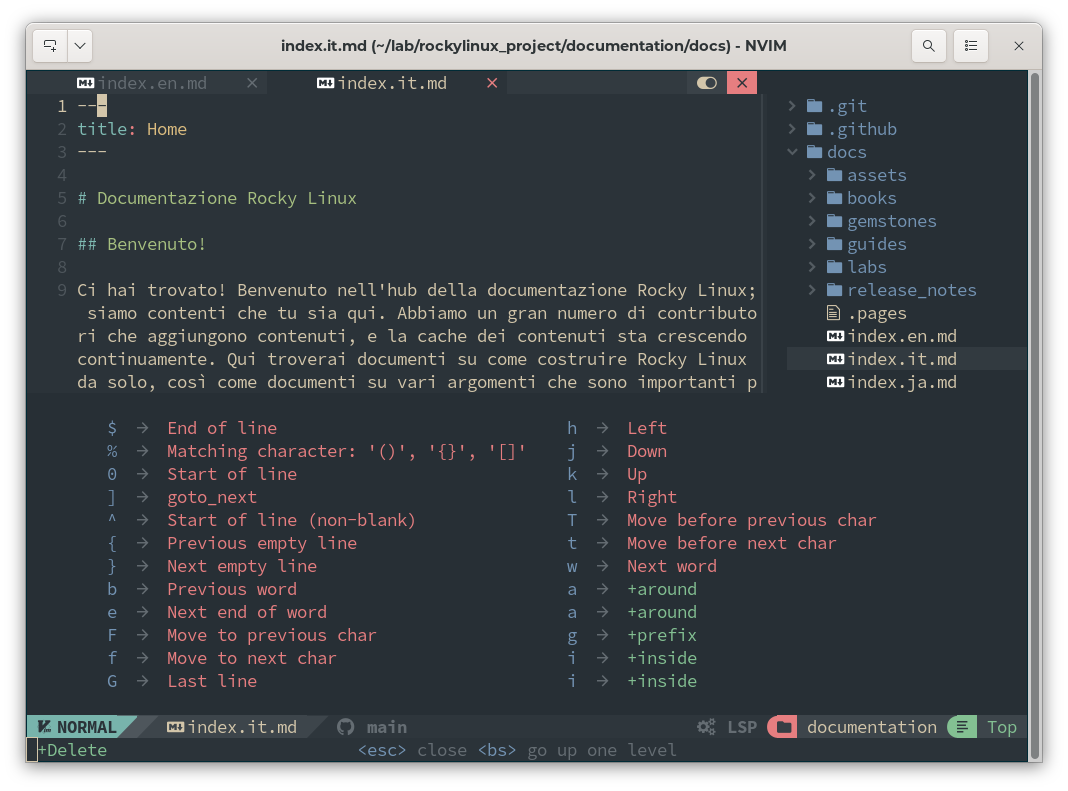
As we can see, almost all the commands refer to navigation within the document or buffer. No commands for opening the file are included. These are provided by the Neovim.
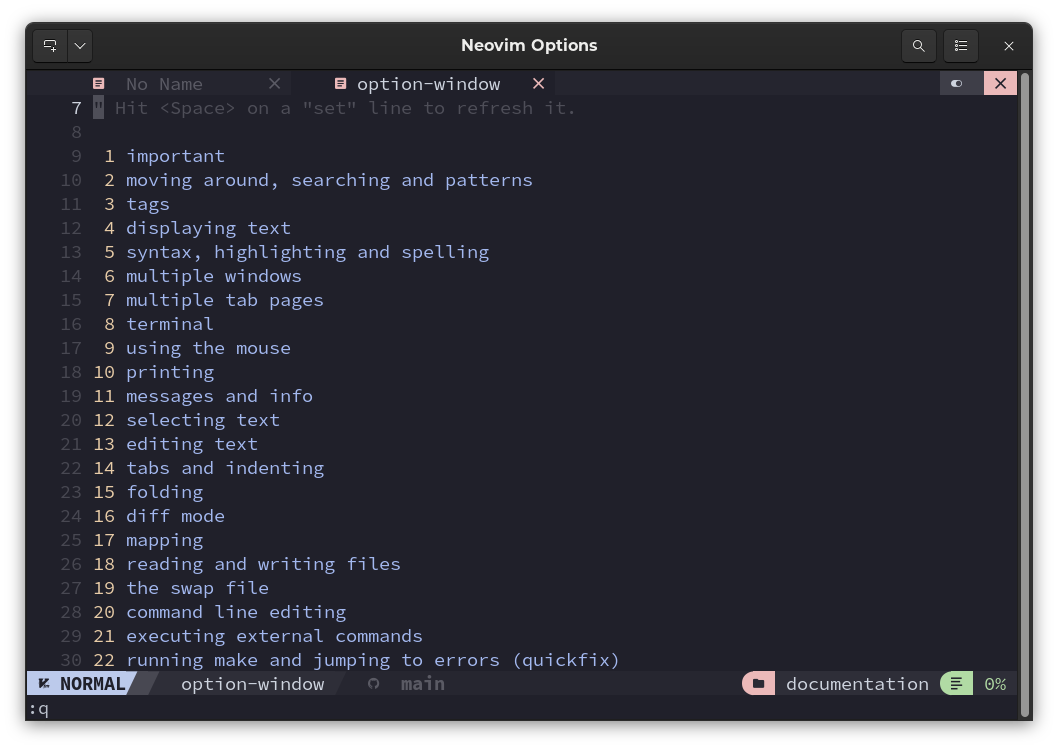
To view all of Neovim's options, the Shift + : + options command is available, which will present a tree of options indexed by category.
This gives us a way, through the built-in help, to learn the commands while using the editor, and also to delve into the available options.
NvimTree
In order to work with our files we need a File Explorer, and this is provided by the kyazdani42/nvim-tree.lua plugin. With the combination Ctrl + n we can open NvimTree.
A detailed description of NvimTree's commands and features can be found on the dedicated page.
Now that we have explored the interface components we can move on to using NvChad.
Author: Franco Colussi
Contributors: Steven Spencer, Ganna Zhyrnova