Editing with NvChad
This chapter will introduce some NvChad-specific commands and some standard Neovim (vim) commands. As previously outlined in NvChad UI, NvChad commands are set in the ..nvim/lua/core/mapping.lua file, and allow keys to be used to execute sometimes very long composite commands.
All sequences are started with a primary key followed by an option. The four main keys are:
- leader = Space
- A = Alt
- C = Ctrl
- S = Shift
Just as in the "NvChad UI" document, we will be substituting the actual command to enter, rather than the mappings.
Open a file
To open a file in our editor we can use various methods. We can simply start from the command line by indicating the file name with:
nvim /path/to/the/file
Or open the editor with the nvim command.
If we use the latter method we have several possibilities. We can open a file in the buffer with the command Shift + : e + Space (edit) followed by the path, or by following the command with the Tab key.
This will show us all the available files and folders starting from the root of the project. It is good to remember that when we use the Tab key in file-opening commands, we can select the file from a convenient drop-down menu. Once this drop-down menu is open, we continue to navigate within it by repeated use of the Tab key.

It's good to remember that each of the commands listed is preceded by Shift and followed with a Space and either the path or the Tab key. Here is a list of other actions:
:view- View the file in read-only mode without the ability to change it. Very good for the protection of critical files.:split- Open the file in an horizontal split screen.:vsplit- Open the file in a vertical split screen.:tabedit- Open the file in a new tab.
In the following example, we have opened the file using :vsplit.

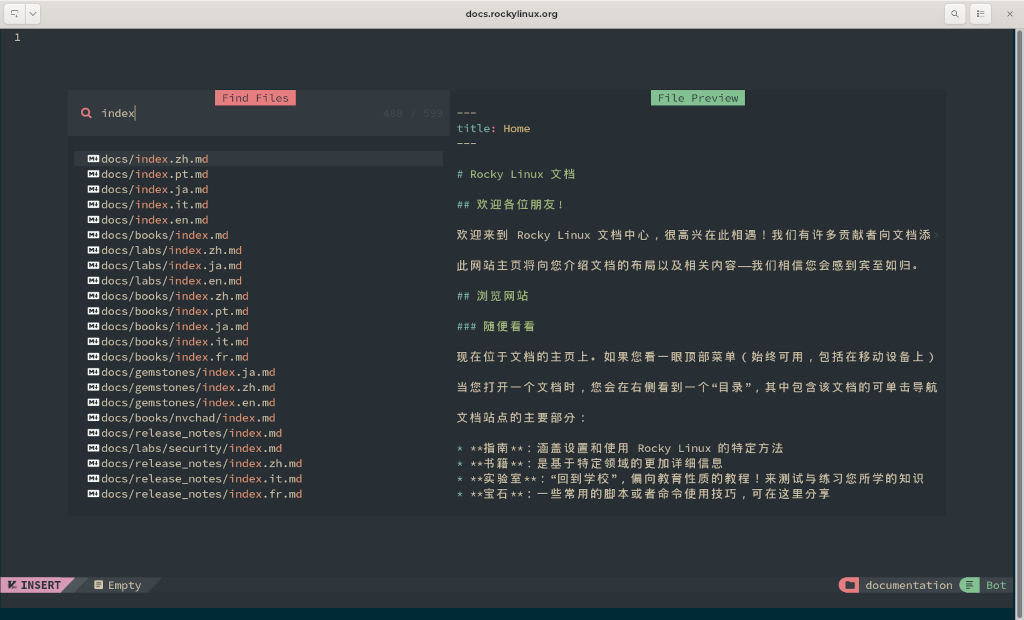
Thanks to the work done by the developers of NvChad, we are provided with an additional way to open a file, which is to use the nvim-telescope/telescope.nvim plugin.
This plugin, when used in combination with RipGrep, allows us to search for the file to be opened in interactive mode. By typing the initial characters of the file we are looking for, the plugin will ignore all non-matching files and present us with only those that match our search. This allows for a very smooth search and open process.
To access telescope's find file feature, we need to be in NORMAL mode in the editor and then type: Shift + : Telescope fd
Working with the Editor
Once the file is open we can start editing it. To do this we need to switch to INSERT mode which is activated by pressing the i (insert) key. The mode indicator in the Statusline should change from NORMAL to INSERT, and the cursor placed in the buffer should also change from a colored rectangle to a | pipe.
Now all the characters we type are inserted into the document starting from the position of the cursor. To move the cursor in INSERT mode the Nvchad developers have set up some convenient mappings which are:
- Ctrl + b to go to the beginning of the line
- Ctrl + e to go to the end of the line
- Ctrl + h to move one character to the left
- Ctrl + l to move one character to the right
- Ctrl + j to go to the next line
- Ctrl + k to go to the previous line
Learning all the combinations takes some time but, once acquired, they will make navigation very fast. For example, if we want to edit the end of the next line to where the cursor is positioned we can get to the end of the current line with Ctrl + e, and then get to the next one with a Ctrl + j and already be in position to add the changes.
Navigation in the document can also be done using the arrow keys on the keyboard, or the mouse.
Text Selection
Text selection can also be done with the mouse and is very convenient, but for this chapter we will use the traditional keyboard-based method.
To select text we need to enter the VISUAL mode. To do this we must first exit the insert mode and switch to normal mode, which is done with the Esc key.
Once we place the cursor at the beginning of the part we want to select, we use the keys Ctrl + v to enter the V-BLOC (Visual Block) mode. Now moving with the cursor we will see that our selection will be highlighted. At this point we can work on the selected part of the text.
If we want to copy the selection to the clipboard we will use the y key. If we want to delete it, the d key. Once the operation is done, the text will no longer be highlighted. For an overview of all the operations that can be performed in Visual Mode you can consult the help directly from the editor with Shift + : help Visual-Mode.

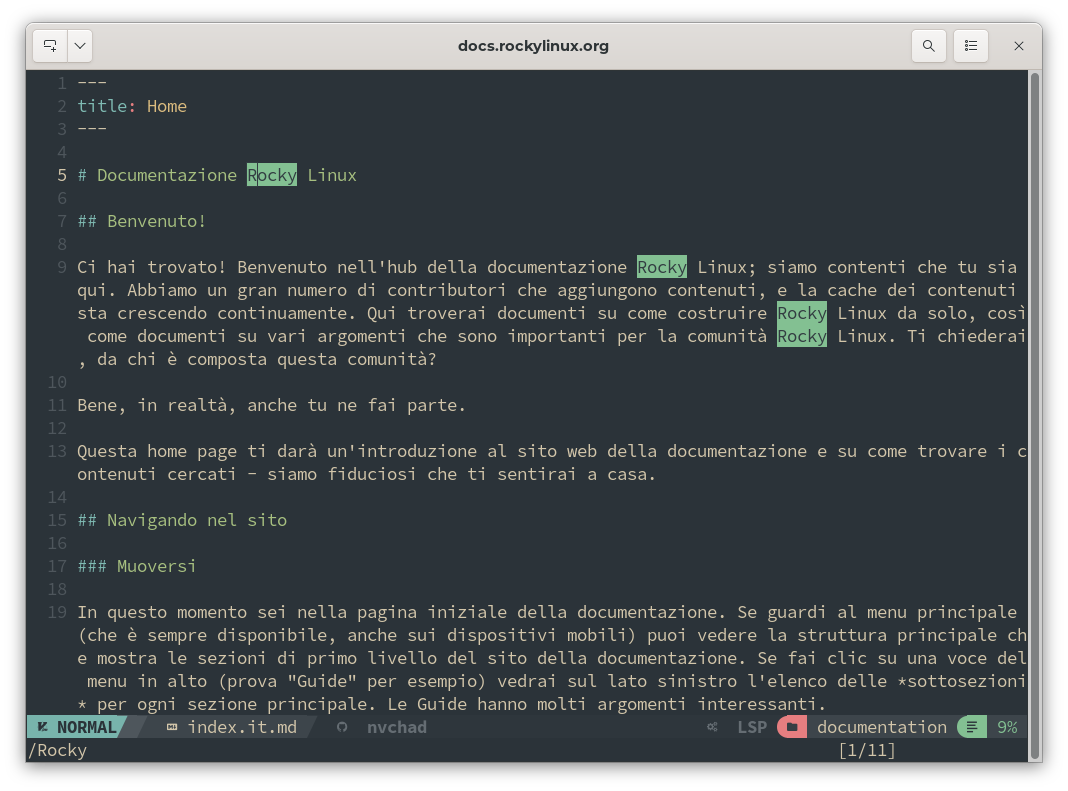
Text search
To search, the slash character / followed by the search key /search_key is used, which highlights all occurrences found. To move to the next one, the combination / + Enter is used. To move to the previous one ? + Enter.
Once you're finished searching, the highlight can be removed with the command Shift + : noh (no highlight).
Searches can be even more complex than the one illustrated above; wildcards, counters, and other options can be used. The help command (Shift + : help) can be used to see more options.
Saving the Document
Once the file is created or modified it is saved by first exiting the INSERT mode with Esc and then entering the command Shift + : + w (write) which will save the file with the current name in the location it is in. If you want to save the file with another name or in another location, just have the command follow the save path:
:w /path/to/new/file_or_position
To save and simultaneously close the editor, the command Shift + : + wq (write - quit) is used.
In this chapter we have introduced you to the editor. There are many more advanced features than those described here. These features can be consulted on the Neovim help page, or by typing the following command in the editor Shift + : + help.
Author: Franco Colussi
Contributors: Steven Spencer, Ganna Zhyrnova