Podman
Introduction
Note
This document represents expanded content from its parent document found here. If you need a quick how-to, that parent document may suffice.
Podman (Pod Manager) is a container and image management tool compatible with the OCI (Open Container Initiative).
Podman:
- works without a daemon (it can run containers as a
systemdservice) - allows you to manage containers as an unprivileged user (no need to be root)
- included, unlike docker, in the Rocky Linux repositories
That makes Podman not only a docker-compatible alternative container runtime but much more.
Install Podman
Use the dnf utility to install Podman:
dnf install podman
You can retrieve the list of available Podman subcommands with the following command:
$ podman --help

Manage pods, containers and images

Usage:
  podman [options] [command]

Available Commands:
  attach      Attach to a running container
  auto-update Auto update containers according to their auto-update policy
...
Here is a non-exhaustive list of the most commonly used subcommands:
| Subcommand | Description |
|---|---|
build | Builds an image using instructions from Containerfiles |
commit | Creates a new image based on the changed container |
container | Manages containers |
cp | Copies files/folders between a container and the local filesystem |
create | Creates but does not start a container |
exec | Runs a process in a running container |
image | Manages images |
images | Lists images in local storage |
info | Displays Podman system information |
init | Initializes one or more containers |
inspect | Displays the configuration of the object denoted by ID |
kill | Kills one or more running containers with a specific signal |
login | Logs in to a container registry |
logs | Fetches the logs of one or more containers |
network | Manages networks |
pause | Pauses all the processes in one or more containers |
ps | Lists containers |
pull | Pulls an image from a registry |
push | Pushes an image to a specified destination |
restart | Restarts one or more containers |
rm | Removes one or more containers |
rmi | Removes one or more images from local storage |
run | Runs a command in a new container |
start | Starts one or more containers |
stats | Displays a live stream of container resource usage statistics |
stop | Stops one or more containers |
system | Manages Podman |
top | Displays the running processes of a container |
unpause | Unpauses the processes in one or more containers |
volume | Manages volumes |
Note
Podman can run almost any Docker command thanks to its similar CLI interface.
If you need to use a compose file, remember to install the podman-compose package:
dnf install podman-compose
Adding a container
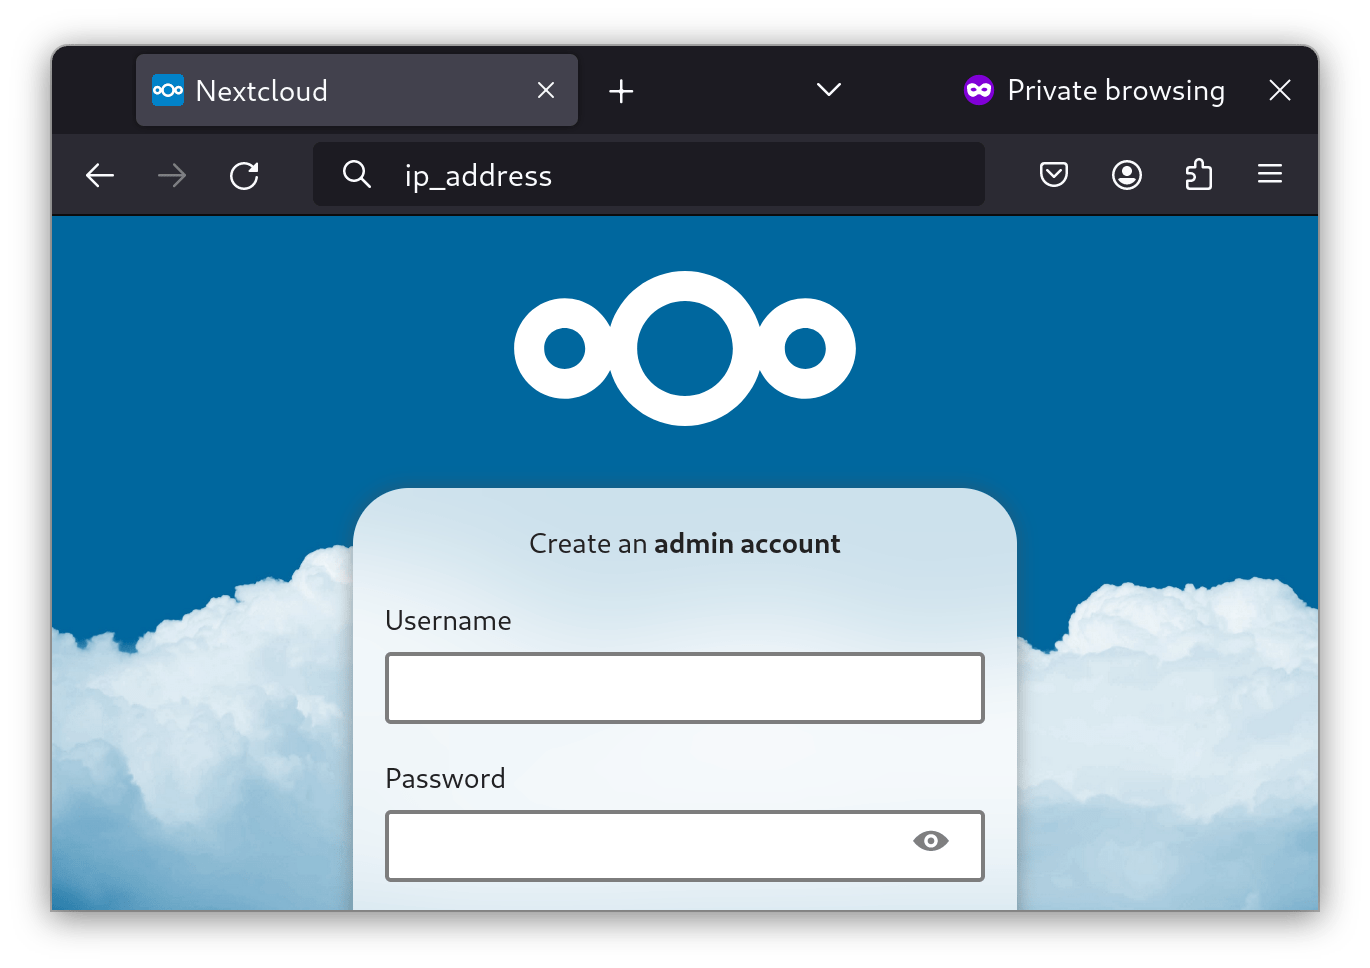
Run a Nextcloud self-hosted cloud platform as an example:
podman run -d -p 8080:80 nextcloud
You will receive a prompt to select the container registry to download from. In our example, you will use docker.io/library/nextcloud:latest.
Once you have downloaded the Nextcloud image, it will run.
Enter ip_address:8080 in your web browser (assuming you opened the port in firewalld) and set up Nextcloud:
Tip
To follow the log output of the last created container use podman logs -lf. -l specifies to use the last created container, while -f specifies to follow the logs, as they are created. Press Ctrl+C to stop the log output.
Running containers as systemd services
Using quadlet
Since 4.4 Podman ships with Quadlet – a systemd generator. It can be used to generate unit files for rootless and rootful systemd services.
Place Quadlet files for rootful services in:
/etc/containers/systemd//usr/share/containers/systemd/
Place rootless files in any of:
$XDG_CONFIG_HOME/containers/systemd/or~/.config/containers/systemd//etc/containers/systemd/users/$(UID)/etc/containers/systemd/users/
Aside from single containers, pod, image, network, volume, and kube files are supported. Let us focus on our Nextcloud example. Create a new file ~/.config/containers/systemd/nextcloud.container with the following content:
[Container]
Image=nextcloud
PublishPort=8080:80
A lot of other options are available.
To run the generator and let systemd know that there is a new service run:
systemctl --user daemon-reload
To now run your service run:
systemctl --user start nextcloud.service
Note
If you created a file in one of the directories for rootful services, omit the --user flag.
To automatically run the container upon system start or user login, you can add another section to your nextcloud.container file:
[Install]
WantedBy=default.target
As the generated service files are considered transient, they cannot be enabled by systemd. To mitigate this, the generator manually applies installs during generation. This effectively also enables those services files.
Other file types are supported: pod, volume, network, image, and kube. Pods, for instance, can be used to group containers – the generated systemd services and their dependencies (create the pod before the containers) are automatically managed by systemd.
Using podman generate systemd
Podman additionally provides the generate systemd subcommand. Use this subcommand to generate systemd service files.
Warning
generate systemd is now deprecated and will not receive further features. The usage of Quadlet is recommended.
Let us now do it with Nextcloud. Run:
podman ps
You will get a list of running containers:
04f7553f431a docker.io/library/nextcloud:latest apache2-foregroun... 5 minutes ago Up 5 minutes 0.0.0.0:8080->80/tcp compassionate_meninsky
As seen above, our container's name is compassionate_meninsky.
To make a systemd service for the Nextcloud container and enable it on reboot, run the following:
podman generate systemd --name compassionate_meninsky > /usr/lib/systemd/system/nextcloud.service
systemctl enable nextcloud
Replace compassionate_meninsky with your container's assigned name.
When your system reboots, Nextcloud will restart in Podman.
Containerfiles
A Containerfile is a file used by Podman to create container images. Containerfiles use the same syntax as Dockerfiles, so you can build your container images with Podman like you would with Docker.
Web server from a Containerfile
You will create an httpd server based on a RockyLinux 9.
Create a folder dedicated to our image:
mkdir myrocky && cd myrocky
Create an index.html file that will run in our web server:
echo "Welcome to Rocky" > index.html
Create a Containerfile file with the following content:
# Use the latest rockylinux image as a start
FROM rockylinux:9

# Make it uptodate
RUN dnf -y update
# Install and enable httpd
RUN dnf -y install httpd
RUN systemctl enable httpd
# Copy the local index.html file into our image
COPY index.html /var/www/html/

# Expose the port 80 to the outside
EXPOSE 80

# Start the services
CMD [ "/sbin/init" ]
You are ready to build our image called myrockywebserver:
$ podman build -t myrockywebserver .

STEP 1/7: FROM rockylinux:9
Resolved "rockylinux" as an alias (/etc/containers/registries.conf.d/000-shortnames.conf)
Trying to pull docker.io/library/rockylinux:9...
Getting image source signatures
Copying blob 489e1be6ce56 skipped: already exists
Copying config b72d2d9150 done
Writing manifest to image destination
STEP 2/7: RUN dnf -y update
Rocky Linux 9 - BaseOS                          406 kB/s | 2.2 MB     00:05
Rocky Linux 9 - AppStream                       9.9 MB/s | 7.4 MB     00:00
Rocky Linux 9 - Extras                           35 kB/s |  14 kB     00:00
Dependencies resolved.
================================================================================
 Package                   Arch      Version                 Repository    Size
================================================================================
Upgrading:
 basesystem                noarch    11-13.el9.0.1           baseos       6.4 k
 binutils                  x86_64    2.35.2-42.el9_3.1       baseos       4.5 M
...
Complete!
--> 2e8b93d30f31
STEP 3/7: RUN dnf -y install httpd
Last metadata expiration check: 0:00:34 ago on Wed Apr  3 07:29:56 2024.
Dependencies resolved.
================================================================================
 Package                Arch       Version                  Repository     Size
================================================================================
Installing:
 httpd                  x86_64     2.4.57-5.el9             appstream      46 k
...
Complete!
--> 71db5cabef1e
STEP 4/7: RUN systemctl enable httpd
Created symlink /etc/systemd/system/multi-user.target.wants/httpd.service → /usr/lib/systemd/system/httpd.service.
--> 423d45a3cb2d
STEP 5/7: COPY index.html /var/www/html/
--> dfaf9236ebae
STEP 6/7: EXPOSE 80
--> 439bc5aee524
STEP 7/7: CMD [ "/sbin/init" ]
COMMIT myrockywebserver
--> 7fcf202d3c8d
Successfully tagged localhost/myrockywebserver:latest
7fcf202d3c8d059837cc4e7bc083a526966874f978cd4ab18690efb0f893d583
You can run your Podman image and confirm that it started:
$ podman run -d --name rockywebserver -p 8080:80 localhost/myrockywebserver
282c09eecf845c7d9390f6878f9340a802cc2e13d654da197d6c08111905f1bd

$ podman ps
CONTAINER ID  IMAGE                              COMMAND     CREATED         STATUS         PORTS                 NAMES
282c09eecf84  localhost/myrockywebserver:latest  /sbin/init  16 seconds ago  Up 16 seconds  0.0.0.0:8080->80/tcp  rockywebserver
You launched your Podman image in daemon mode (-d) and named it rockywebserver (option --name).
You redirected port 80 (protected) to port 8080 with the -p option. See if the port is listening with:
ss -tuna | grep "*:8080"
tcp   LISTEN    0      4096                *:8080             *:*
Verify that the index.html file is accessible:
$ curl http://localhost:8080
Welcome to Rocky
Congratulations! You can now stop and destroy your running image, giving the name you provided during creation:
podman stop rockywebserver && podman rm rockywebserver
Tip
You can add the --rm switch to automatically delete the container once it stops.
If you relaunch the build process, podman will use a cache at each step of the build:
$ podman build -t myrockywebserver .

STEP 1/7: FROM rockylinux:9
STEP 2/7: RUN dnf -y update
--> Using cache 2e8b93d30f3104d77827a888fdf1d6350d203af18e16ae528b9ca612b850f844
--> 2e8b93d30f31
STEP 3/7: RUN dnf -y install httpd
--> Using cache 71db5cabef1e033c0d7416bc341848fbf4dfcfa25cd43758a8b264ac0cfcf461
--> 71db5cabef1e
STEP 4/7: RUN systemctl enable httpd
--> Using cache 423d45a3cb2d9f5ef0af474e4f16721f4c84c1b80aa486925a3ae2b563ba3968
--> 423d45a3cb2d
STEP 5/7: COPY index.html /var/www/html/
--> Using cache dfaf9236ebaecf835ecb9049c657723bd9ec37190679dd3532e7d75c0ca80331
--> dfaf9236ebae
STEP 6/7: EXPOSE 80
--> Using cache 439bc5aee524338a416ae5080afbbea258a3c5e5cd910b2485559b4a908f81a3
--> 439bc5aee524
STEP 7/7: CMD [ "/sbin/init" ]
--> Using cache 7fcf202d3c8d059837cc4e7bc083a526966874f978cd4ab18690efb0f893d583
COMMIT myrockywebserver
--> 7fcf202d3c8d
Successfully tagged localhost/myrockywebserver:latest
7fcf202d3c8d059837cc4e7bc083a526966874f978cd4ab18690efb0f893d583
You can clear that cache with the prune subcommand:
podman system prune -a -f
| Options | Description |
|---|---|
-a | Removes all unused data, not only the external to Podman |
-f | No prompt for confirmation |
--volumes | Prune volumes |
Pods
Pods are a way to group containers together. Containers in a pod share some settings, like mounts, resource allocations, or port mappings.
In Podman, you manage pods using the podman pod subcommand, similar to many Podman commands, to control containers:
| Command | Description |
|---|---|
| clone | Creates a copy of an existing pod. |
| create | Creates a new pod. |
| exists | Checks if a pod exists in local storage. |
| inspect | Display information describing a pod. |
| kill | Kills the main process of each container in one or more pods. |
| logs | Displays logs for pod with one or more containers. |
| pause | Pauses one or more pods. |
| prune | Removes all stopped pods and their containers. |
| ps | Prints out information about pods. |
| restart | Restarts one or more pods. |
| rm | Removes one or more stopped pods and containers. |
| start | Starts one or more pods. |
| stats | Displays a live stream of resource usage stats for containers in one or more pods. |
| stop | Stops one or more pods. |
| top | Displays the running processes of containers in a pod. |
| unpause | Unpauses one or more pods. |
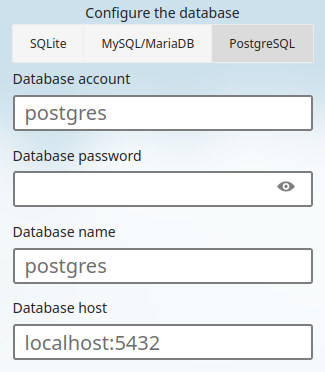
Containers grouped into a pod can access each other by using localhost. It is useful, for instance, when setting up Nextcloud with a dedicated database like Postgres. Nextcloud can access the database, but the database does not need to be accessible from outside the containers.
To create a pod containing Nextcloud and a dedicated database, run the following:
# Create the pod with a port mapping
podman pod create --name nextcloud -p 8080:80

# Add a Nextcloud container to the pod – the port mapping must not be specified again!
podman create --pod nextcloud --name nextcloud-app nextcloud

# Add a Postgres database. This container has a postgres specific environment variable set.
podman create --pod nextcloud --name nextcloud-db -e POSTGRES_HOST_AUTH_METHOD=trust postgres
To run your newly created pod, run:
podman pod start nextcloud
You can now setup Nextcloud using a local database:
Author: Neel Chauhan, Antoine Le Morvan
Contributors: Steven Spencer, Ganna Zhyrnova, Christian Steinert