NvimTree - File Explorer
An editor, to be functional, must provide support for opening and managing the files we want to write or edit. Neovim, in its basic installation, does not provide the functionality for file management. This is implemented by NvChad with the kyazdani42/nvim-tree.lua plugin. The plugin provides a file explorer from which you can perform all the most common operations on files through keyboard keys. To open it you use the combination Ctrl + n, which is available only in NORMAL mode, and with the same key combination you close it.
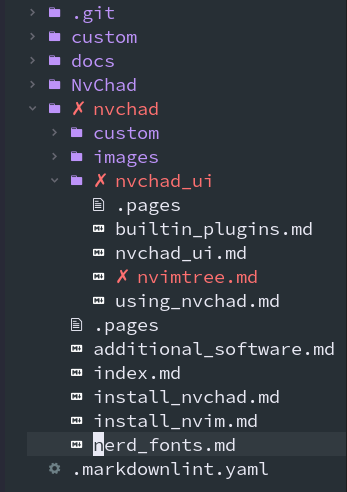
If we have installed the Nerd Fonts we will have, as evidenced by the screenshot, a file explorer that although textual will give us a graphical representation of our file tree.
Once open, we can switch from the explorer window to the editor window and vice versa with the combinations Ctrl + h to move left and Ctrl + l to move right.
Working with the File Explorer
To work with your project's file tree NvimTree provides a number of useful shortcuts for its management, which are:
- R (refresh) to perform a reread of the files contained in the project
- H (hide) to hide/display hidden files and folders (beginning with a dot
.) - E (expand_all) to expand the entire file tree starting from the root folder (workspace)
- W (collapse_all) to close all open folders starting from the root folder
- - (dir_up) allows you to go back up folders. This navigation also allows you to exit the root folder (workspace) to your home directory
- s (system) to open the file with the system application set by default for that file type
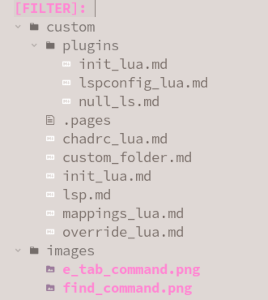
- f (find) to open the interactive file search to which search filters can be applied
- F to close the interactive search
- Ctrl + k to display information about the file such as size, creation date, etc.
- g + ? to open the help with all the predefined shortcuts for quick reference
- q to close the file explorer
Note:
The interactive search performed with f as with navigating with the arrows > < remains confined to the folder where NvimTree is currently located. To do a global search over the entire workspace you must first open the entire file tree with E and then start the search with f.
The search brings the NvimTree_1 buffer to the INSERT state for typing our filters. If no file is selected, exiting it requires that you return the buffer to NORMAL with Esc before closing the search with F.
Select a File
To select a file we must first make sure that we are in the nvimtree buffer highlighted in the statusline with NvimTree_1. To do this we can use the window selection keys mentioned above or the specific Space + e command provided by NvChad which will position the cursor in the file tree. The combination is part of NvChad's default mapping and corresponds to the plugin's :NvimTreeFocus command.
To move through the file tree we are given the > and < keys that allow us to move up and down the tree until we reach the desired folder. Once positioned, we can open it with Enter and close it with BS.
It must be emphasized that navigation with the > and < keys always refers to the current folder. This means that once a folder is opened and positioned within it the navigation will remain confined to that folder. To exit the folder we use the Ctrl + p (parent directory) key which allows us to go up from the current folder to the folder from which we opened the editor and which corresponds to our workspace defined in the statusline on the right.
Opening a File
Positioned in the desired folder and with the file selected to be edited, we have the following combinations to open it:
- Enter or o to open the file in a new buffer and place the cursor on the first line of the file
- Tab to open the file in a new buffer while keeping the cursor in nvimtree, this for example is useful if you want to open several files at once
- Ctrl + t to open the file in a new tab that can be managed separately from the other buffers present
- Ctrl + v to open the file in the buffer by dividing it vertically into two parts, if there was already an open file this will be displayed side by side with the new file
- Ctrl + h to open the file like the command described above but dividing the buffer horizontally
File Management
Like all file explorers, in nvimtree you can create, delete, and rename files. Since this is always with a textual approach, you will not have a convenient graphical widget but the directions will be shown in the statusline. All combinations have a confirmation prompt (y/n) to give a way to verify the operation and thus avoid inappropriate changes. This is particularly important for deletion of a file, as a deletion would be irreversible.
The keys for modification are:
- a (add) allows the creation of files or folders, creating a folder is done by following the name with the slash
/. E.g./nvchad/nvimtree.mdwill create the related markdown file while/nvchad/nvimtree/will create the nvimtree folder. The creation will occur by default at the location where the cursor is in the file explorer at that time, so the selection of the folder where to create the file will have to be done previously or alternatively you can write the full path in the statusline, in writing the path you can make use of the auto-complete function - r (rename) to rename the selected file from the original name
- Ctrl + r to rename the file regardless of its original name
- d (delete) to delete the selected file or in case of a folder delete the folder with all its contents
- x (cut) to cut and copy the selection to the clipboard, can be files or folders with all its contents, with this command associated with the paste command you make the file moves within the tree
- c (copy) like the previous command this copies the file to the clipboard but keeps the original file in its location
- p (paste) to paste the contents of the clipboard to the current location
- y to copy only the file name to the clipboard, there are also two variants which are Y to copy the relative path and g + y to copy the absolute path
Advanced Features
Although disabled by default, nvimtree integrates some functionality to control a possible Git repository. Such functionality is enabled by using override of the base settings as described on the override section of the Template Chadrc page.
The related code is as follows:
M.nvimtree = {
    git = {
        enable = true,
    },
    renderer = {
        highlight_git = true,
        icons = {
        show = {
            git = true,
            },
        },
    },
    view = {
        side = "right",
    },
}
Once the Git functionality is enabled, our file tree will give us real-time status of our local files with respect to the Git repository.
Conclusion
The kyazdani42/nvim-tree.lua plugin provides the File Explorer to the Neovim editor, which is certainly one of the essential building blocks of the NvChad IDE, from which all common file operations can be performed. It also integrates advanced features, but these must be enabled. More information can be found on the Project Page.
Author: Franco Colussi
Contributors: Steven Spencer, Ganna Zhyrnova