Firewall GUI App
Introduction
Want to manage your firewall without all that command-line stuff? There is a great app specifically built for firewalld, the firewall used in Rocky Linux, and it is available on Flathub. This guide will show you how to get it up and running quickly and the basics of the interface.
We will not cover everything that firewalld or the GUI can accomplish, but it should be enough to get you started.
Assumptions
For this guide, we assume that you have the following:
- A Rocky Linux install with any graphical desktop environment
sudoor admin access- A fundamental understanding of how
firewalldworks
Note
Remember that while this app makes your life easier if you prefer using a GUI, you will still need to understand the basic concepts behind firewalld. You must know about ports, zones, services, sources, etc.
If you are not clear on any of this, please see the Beginner's guide to firewalld, and read about zones in particular, to get a feel for what they do.
Installing the app
Go into the Software Center app and search for "Firewall". It is a native package in the Rocky Linux repository, and it will be called "Firewall", so it should be easy to find.
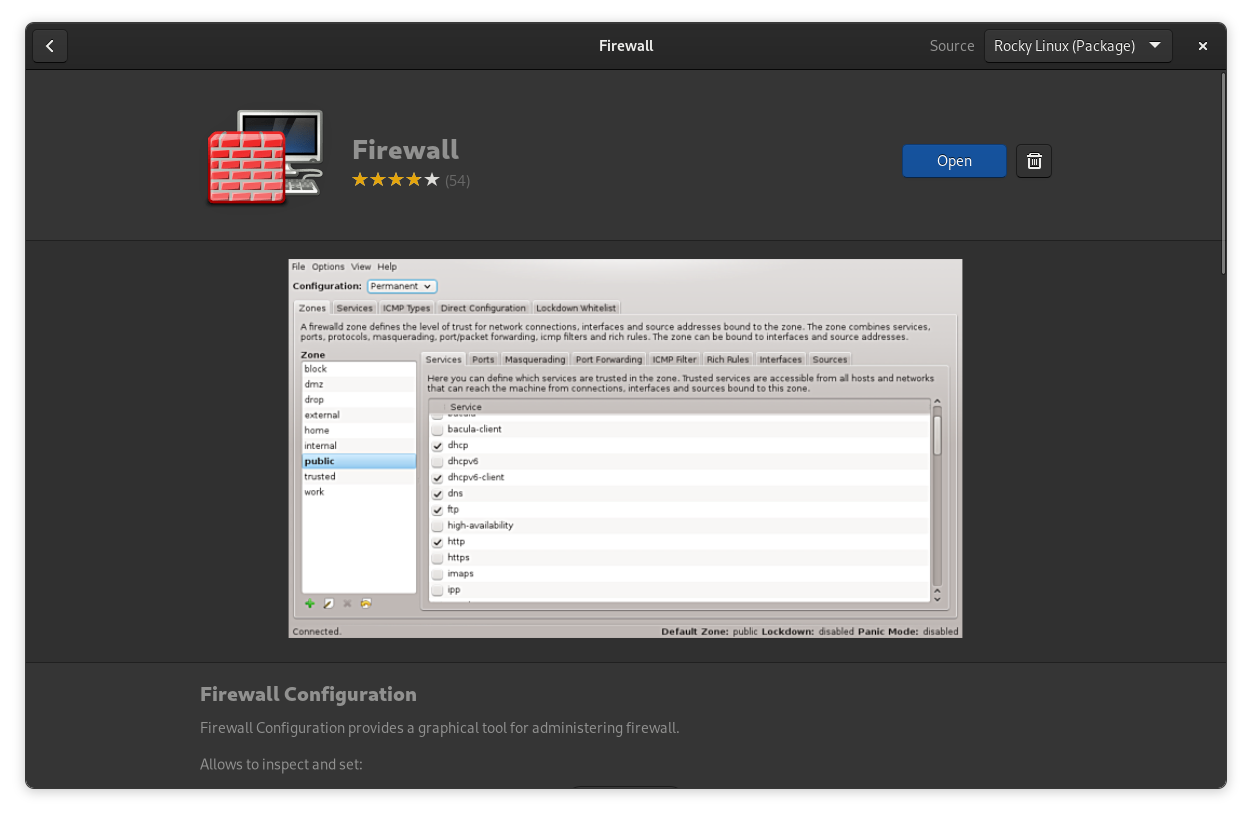
It is firewall-config in the repository and is installable with the usual command:
sudo dnf install firewall-config
When you open the app, it will ask for your password. It will also ask again before performing sensitive operations.
Configuration modes
The first thing to be aware of is your configuration mode, which is selectable in the dropdown menu at the top of the window. Your choices are Runtime and Permanent.
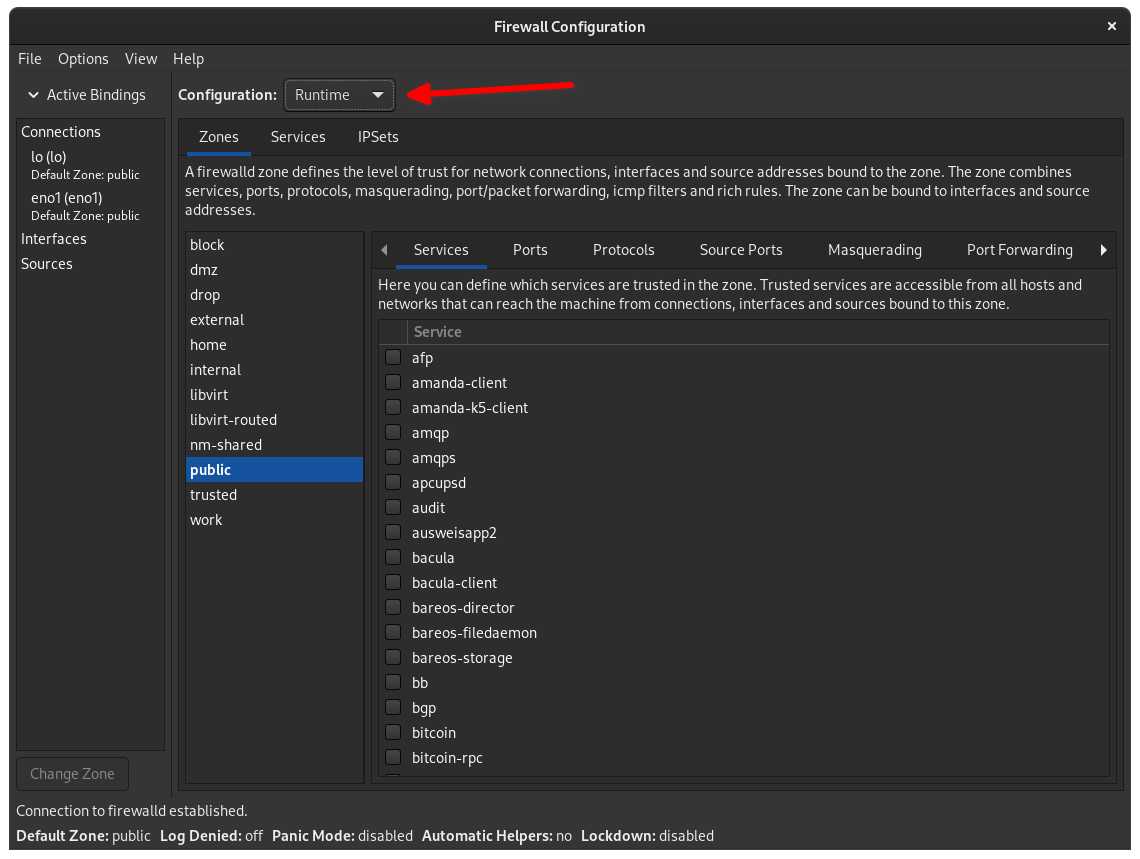
Opening up ports, adding permitted services, and any other changes made in the Runtime mode are temporary, and it does not give you access to all features. Upon reboot or when reloading the firewall manually, those changes will disappear. This is great when you only need to make a quick change to accomplish a single task or if you want to test your changes before making them permanent.
Once you have, for example, opened up a port in the Public zone, you can go to Options > Runtime To Permanent to save your changes.
The permanent mode is riskier, but it opens up all features. It allows the creation of new zones, the individual configuration of services, the management of your network interfaces, and the addition of IPSets (in other words, sets of IP addresses that are or are not allowed to contact your computer or server).
After making permanent changes, go to Options > Reload Firewalld to enable them properly.
Managing Interfaces/Connections
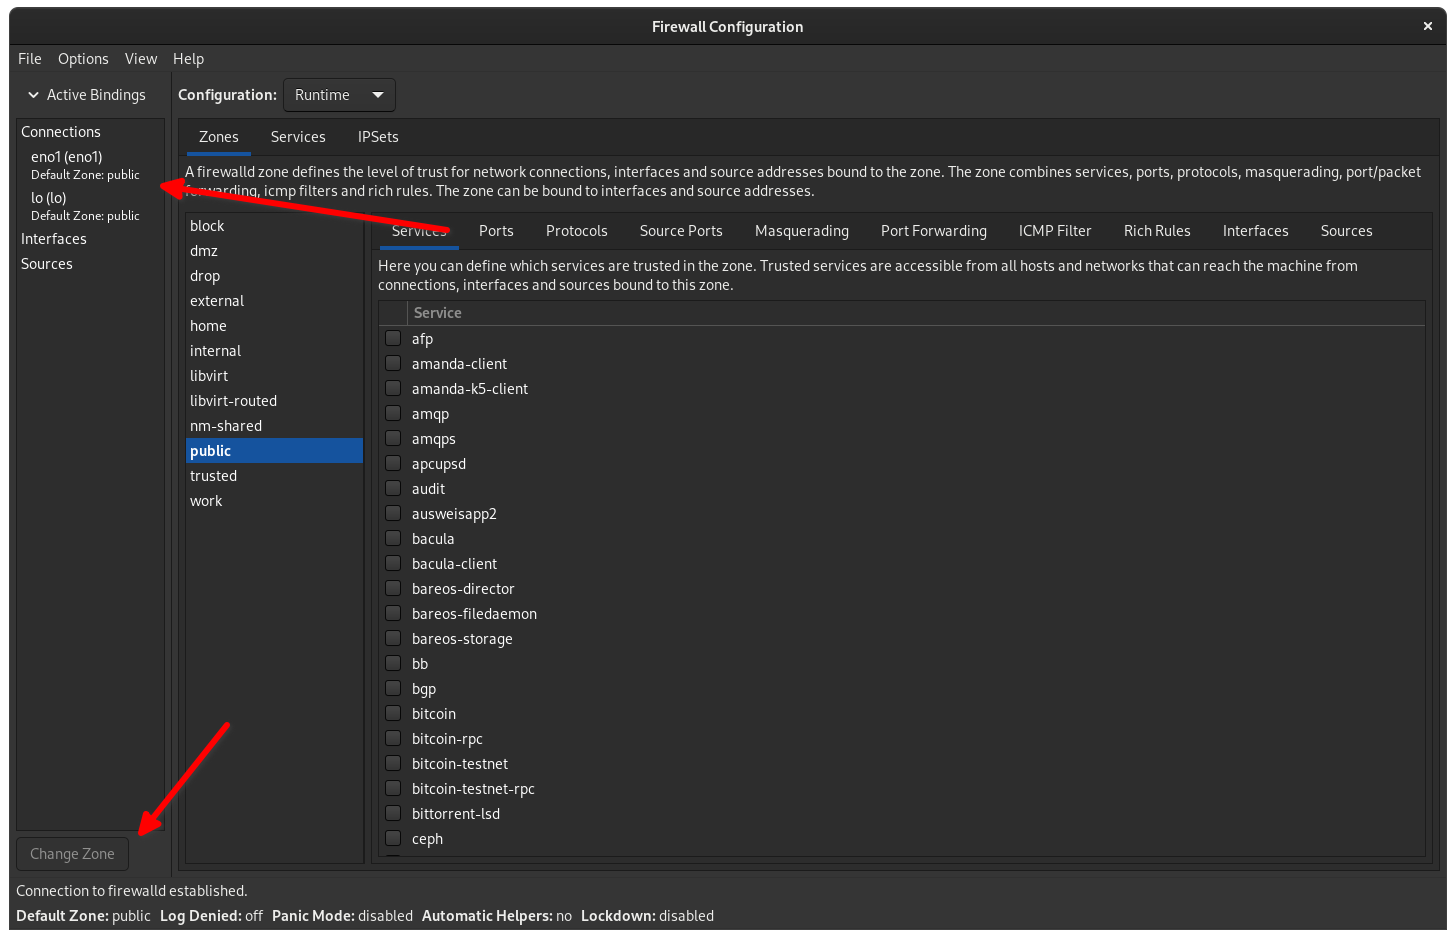
The panel on the far left, labeled "Active Bindings," is where you will find your network connections and manually add a network interface. If you scroll back up, you will see my Ethernet connection (eno1). The "public" zone is well-protected by default and includes your network connection.
At the bottom of the panel, you will find the "Change Zone" button, which allows you to assign your connection to another zone. In Permanent mode, you can also create your own custom Zones.
Managing Zones
In the first tab on the right panel, you will find the Zone menu. Here, you can open and close ports, turn services on or off, add trusted IP addresses for incoming traffic (think local networks), enable port forwarding, add rich rules, and more.
For most basic desktop users, this is where you will spend most of your time, and the most valuable sub-tabs in this panel will be the ones for configuring services and ports.
Note
Install your apps and services from the repository. Some of them (usually the ones designed for Desktop use) will automatically enable the relevant services or open the proper ports. However, if that does not happen, you can follow the steps below to do it all manually.
Adding a service to a Zone
Services are popular apps and background services that are firewalld and supported by default. You can quickly and easily enable them by scrolling through the list and clicking the relevant checkbox.
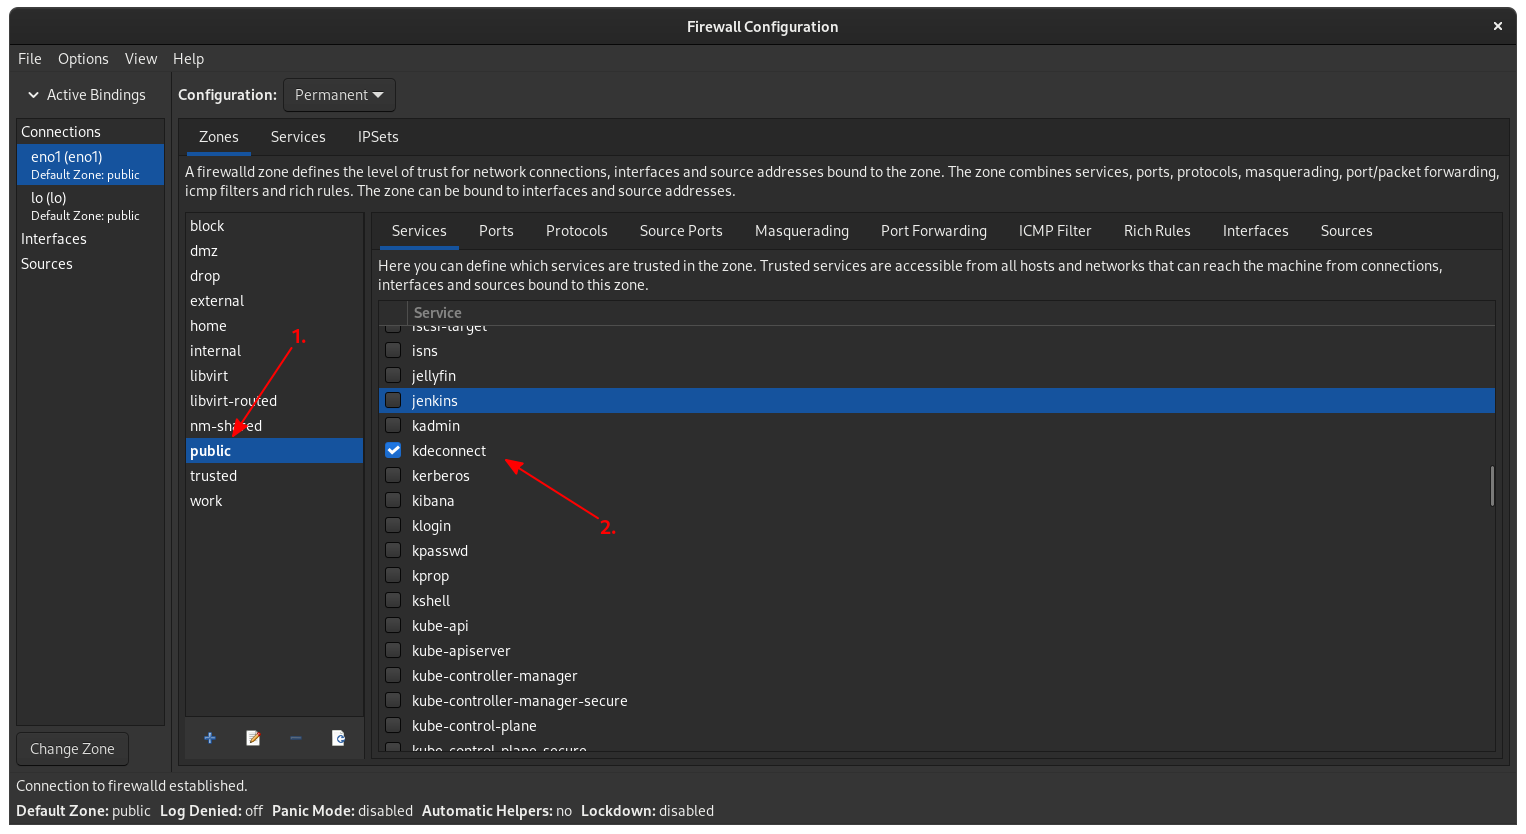
Now, if you have installed KDE Connect* to help sync your desktop with other devices, and you want to allow it through your firewall so it will work, you would:
- First, select the zone you want to edit. Just go with the default public zone for this example.
- Scroll down the list, and select "kdeconnect".
- If you are in the Runtime configuration mode, do not forget to click "Runtime To Permanent" and "Reload Firewalld" in the options menu.
* Available in the EPEL repository.
Other popular services on the list include HTTP & HTTPS for hosting websites, SSH for allowing terminal-based access from other devices, Samba for hosting Windows-compatible file shares, and many more.
However, not every program is on the list, and you might need to open a port manually.
Opening ports on a Zone
Opening ports for specific apps is simple enough. Just read the documentation to know the ports you need.
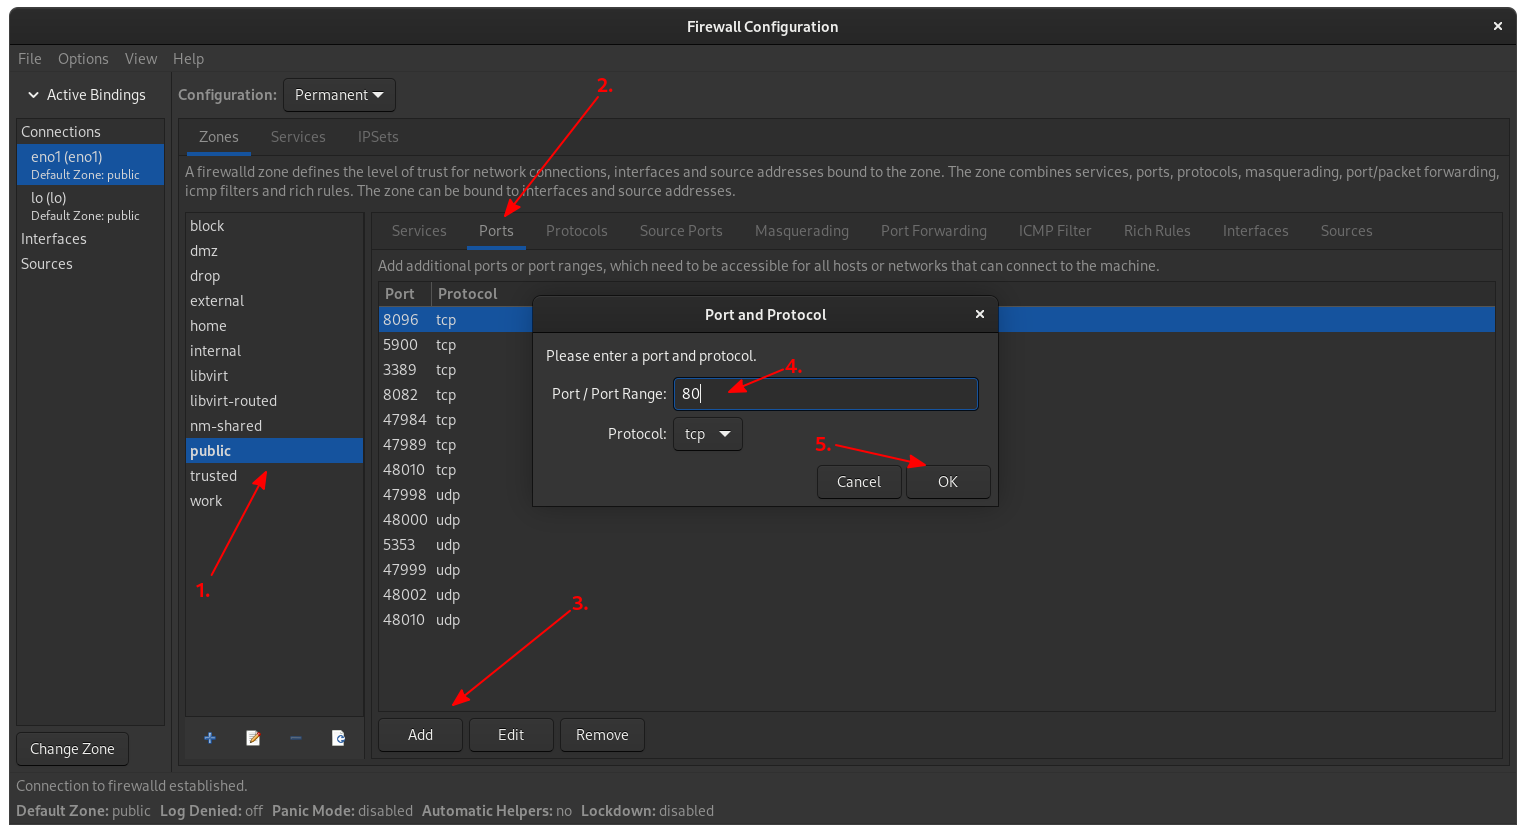
- Again, select the zone you want to edit.
- Go to the Ports tab in the panel on the right.
- Click the Add button.
- Fill in the text field with the port(s) you need to open. Check which protocol the app needs and the networking protocol it uses (e.g., TCP/UDP, etc.).
- Click OK, and use the "Runtime To Permanent" and "Reload Firewalld" options.
Conclusion
If you want to exercise your brain, you should read more about the fundamentals of firewalld. You can also use the "Services" tab at the top of the right panel (next to "Zones") to configure exactly how your services work or control the access of other computers allowed to talk to yours with IPSets and Sources.
Or you can open up the port for your Jellyfin server and get on with your day. firewalld is an incredibly powerful tool, and the Firewall app can help you discover its capabilities in a beginner-friendly way.
Author: Ezequiel Bruni
Contributors: Steven Spencer, Ganna Zhyrnova