Turning Neovim into an advanced IDE
Pre-requisites
As specified on the NvChad site you need to ensure the system meets the following requirements:
- Neovim 0.10.0.
- Nerd Font Set it in your terminal emulator.
- Make sure the nerd font you set doesn't end with Mono
- Example: Iosevka Nerd Font and not
Iosevka Nerd Font Mono
- Ripgrep is required for grep searching with Telescope (OPTIONAL).
- GCC and Make
Performing a Clean Installation
As specified in the requirements, installing this new configuration on top of a previous one can create unfixable problems. A clean installation is recommended.
Preliminary Operations
If you have used the Neovim installation before, it will have created three folders in which to write your files, which are:
~/.config/nvim
~/.local/share/nvim
~/.cache/nvim
To perform a clean installation of the configuration, we need to back up the previous one first:
mkdir ~/backup_nvim
cp -r ~/.config/nvim ~/backup_nvim
cp -r ~/.local/share/nvim ~/backup_nvim
cp -r ~/.cache/nvim ~/backup_nvim
And then we delete all previous configurations and files:
rm -rf ~/.config/nvim
rm -rf ~/.local/share/nvim
rm -rf ~/.cache/nvim
Installation
The creation of the configuration structure is implemented by copying files from an initialization repository (starter) using Git. This method allows installing the NvChad configuration, prepared as a Neovim plugin, within the lazy.nvim plugin manager.
This way, the configuration is updated like all other plugins, simplifying the user's management. Moreover, this approach makes the entire user configuration independent, allowing its total management and distribution among multiple machines.
To download and initialize the configuration, use the following command:
git clone https://github.com/NvChad/starter ~/.config/nvim && nvim
The command consists of two parts. The first downloads the contents of the starter repository to ~/.config/nvim/ (default folder for Neovim settings), while the second invokes the nvim executable which initializes the editor with the configuration you just downloaded. Once you have finished installing the plugins and parsers, you will be faced with the following screen. To close the plugins manager, type q :
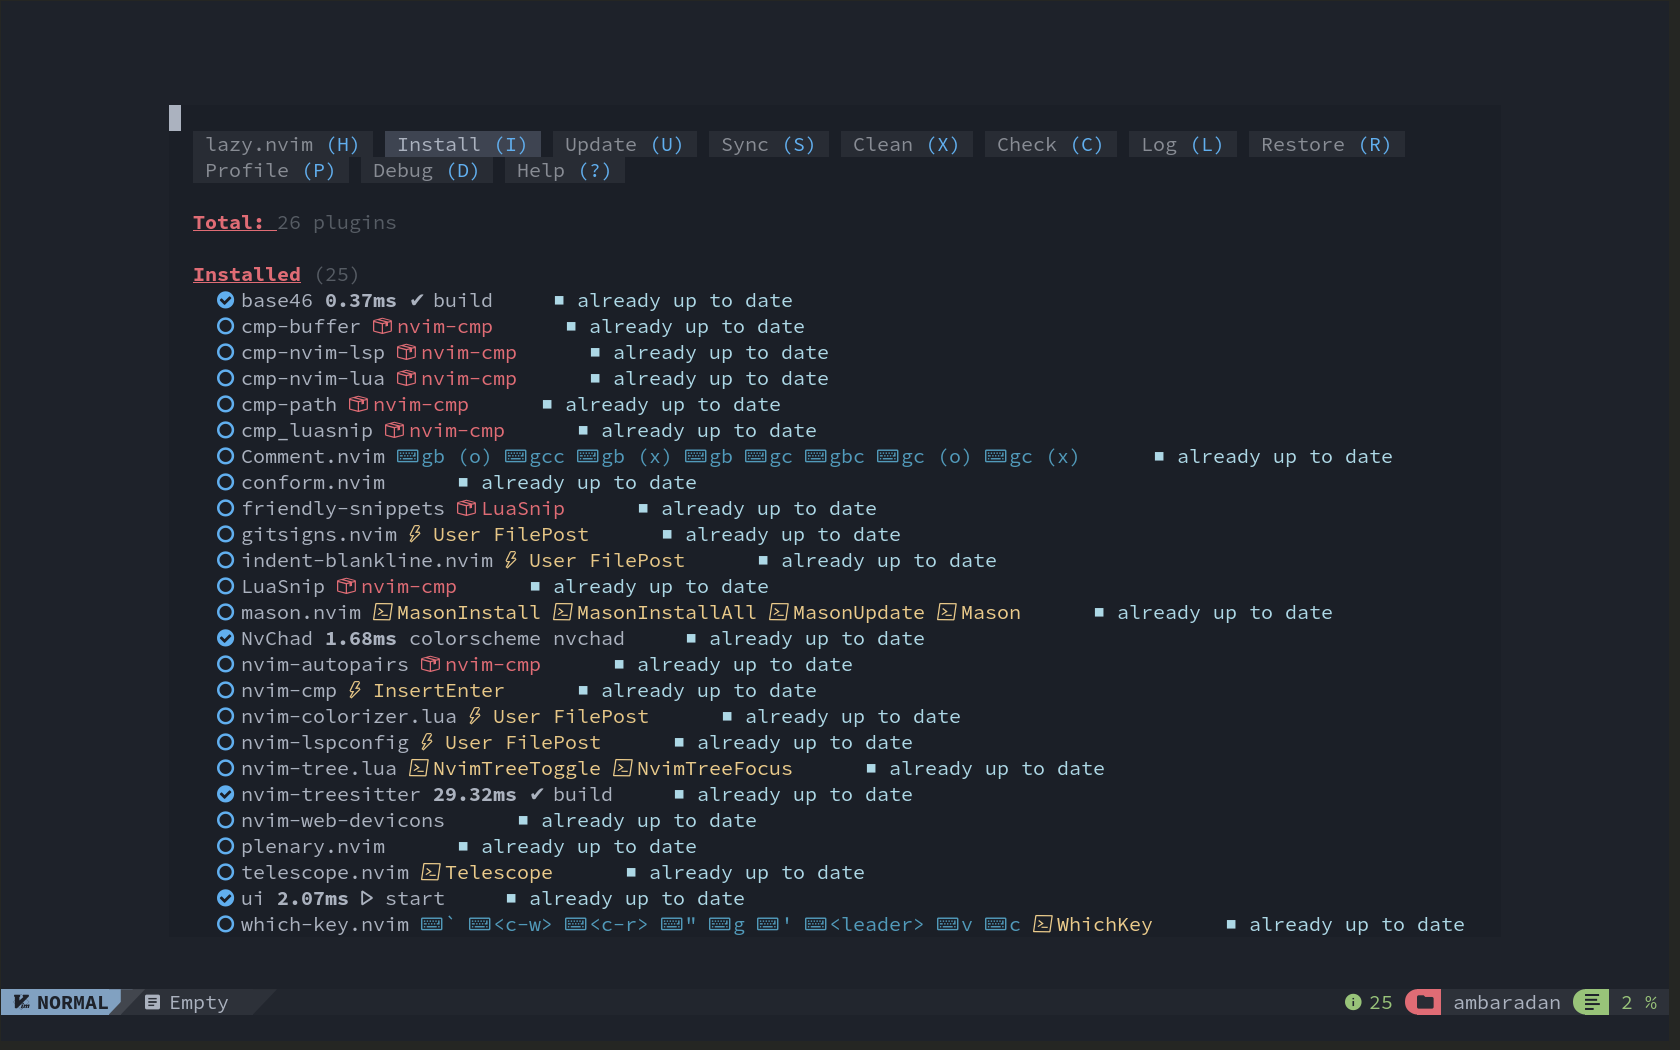
The initial configuration is minimal and provides a starting point for your customization. As evidenced by the screenshot when the editor is first started, only four modules (plugins), marked with a checkmark, are loaded, which are as follows:
- base46 - provides editor themes
- NvChad - the basic configuration that allows the user configuration to be entered into Neovim
- nvim-treesitter - for analysis and highlighting of code
- ui - the editor interface (statusline, tabufline..)
The remaining modules will be activated, thanks to the lazyloading technique, when the functionality provided by the module is requested. This improves the performance of the editor in general and, in particular, improves its startup time.
At this point, the editor is ready to be used. The following sections provide an in-depth look at the installation process and are not necessary for its day-to-day use. If you are interested only in its use, you can turn to the Using NvChad page.
However, reading the official documentation for an introduction to its components and functionality remains recommended.
To close the editor, use the key : q.
Bootstrap
The bootstrap process is implemented in the init.lua file of the starter repository and consists of the following steps:
An initial setting of the default theme path and <leader> key, in this case the Space key:
vim.g.base46_cache = vim.fn.stdpath "data" .. "/nvchad/base46/"
vim.g.mapleader = " "
A subsequent installation of the main lazy.nvim plugin:
-- bootstrap lazy and all plugins
local lazypath = vim.fn.stdpath "data" .. "/lazy/lazy.nvim"

if not vim.loop.fs_stat(lazypath) then
  local repo = "https://github.com/folke/lazy.nvim.git"
  vim.fn.system { "git", "clone", "--filter=blob:none", repo, "--branch=stable", lazypath }
end

vim.opt.rtp:prepend(lazypath)

local lazy_config = require "configs.lazy"
And installation of NvChad plugins and all those configured in the plugins folder:
-- load plugins
require("lazy").setup({
  {
    "NvChad/NvChad",
    lazy = false,
    branch = "v2.5",
    import = "nvchad.plugins",
    config = function()
      require "options"
    end,
  },

  { import = "plugins" },
}, lazy_config)
Then apply the theme to the default and statusline settings:
-- load theme
dofile(vim.g.base46_cache .. "defaults")
dofile(vim.g.base46_cache .. "statusline")
When finished, the autocmds (Neovim auto-commands) required for configuration operation and keyboard mappings are also entered:
require "nvchad.autocmds"

vim.schedule(function()
  require "mappings"
end)
Configuration Structure
The structure installed by NvChad is as follows:
~/.config/nvim/
├── init.lua
├── lazy-lock.json
├── LICENSE
├── lua
│   ├── chadrc.lua
│   ├── configs
│   │   ├── conform.lua
│   │   └── lazy.lua
│   ├── mappings.lua
│   ├── options.lua
│   └── plugins
│       └── init.lua
└── README.md
It consists of a starting file init.lua that initializes and coordinates the insertion of customizations into the configuration of Neovim, this file initially looks identical to the file used by the bootstrap from the starter repository shown above, it will be used later for loading other files into the configuration such as its own autocommands.lua file.
This is followed by the lazy-lock.json file where all the plugins in the installation and their status with respect to development on GitHub are stored. This file allows the editor status to be synchronized between installations present on multiple machines and allows custom installations to replicate the desired status.
The rest of the configuration is located in the lua folder and is initialized starting with the chadrc.lua file, which in the initial version contains only the editor theme setting.
This file is used for customizing the appearance of the editor (UI) and shares syntax with the nvconfig.lua file of the NvChad plugin; to compile it, simply copy the desired part of the nvconfig.lua file into your chadrc.lua and change its properties as needed.
The next file used by the configuration, the folders will be described later, is the option.lua file for editor customizations, such as indentation spaces, sharing the clipboard with the guest system, and very importantly, the inclusion of the binaries installed by Mason in the path.
Like the previous one, it shares the syntax of the corresponding file of the NvChad plugin; for its customization as above, simply copy the options and edit them.
Last, the mapping.lua file is encountered where to set the keyboard keys to invoke the various features offered by the editor. The initial file contains the key mapping for entering COMMAND mode, for formatting with conform.nvim and the key for exiting INSERT mode.
The keys use Neovim's native vim.keymap.set syntax and for their configuration you can refer to NvChad's default mapping or alternatively to the help page included in Neovim :h vim.keymap.set.
require "nvchad.mappings"

-- add yours here

local map = vim.keymap.set

map("n", ";", ":", { desc = "CMD enter command mode" })

map("n", "<leader>fm", function()
  require("conform").format()
end, { desc = "File Format with conform" })

map("i", "jk", "<ESC>", { desc = "Escape insert mode" })
The two folders included in the configuration configs and plugins both serve to manage plugins; personal plugins should be placed in the plugins folder and their additional configurations, if any, in the configs folder.
Initially, a plugins/init.lua file will be available for installation with the conform.lua plugin configured in configs/conform.lua and nvimtree.nvim with the option for decorations related to Git inside it.
Organization of plugins
The inclusion of plugins is done by inserting any properly configured file present in the plugins folder, this allows the plugins to be organized, for example by purpose, by creating separate files (utils.lua, editor.lua, markdown.lua, etc.) in this way it is possible to work on the configuration in a more orderly manner.
There are also files for licensing and a README.md copied from the starter repository that can be used to illustrate one's configuration in case it is maintained in a Git repository.
Main keyboard keys
This is the call that returns basic command mappings:
vim.schedule(function()
  require "mappings"
end)
This sets four main keys from which, in association with other keys, commands can be launched. The main keys are:
- C = Ctrl
- leader = Space
- A = Alt
- S = Shift
Note
We will refer to these key mappings several times throughout these documents.
The default mapping is contained in lua/mapping.lua of the NvChad plugin but can be extended with other custom commands using its own mappings.lua.
<leader>th to change the theme Space + t + h
<C-n> to open nvimtree Ctrl + n
<A-i> to open a terminal in a floating tab Alt + i
There are many combinations pre-set for you, and they cover all the uses of NvChad. It is worth pausing to analyze the key mappings before starting to use your NvChad-configured instance of Neovim.
Author: Franco Colussi
Contributors: Steven Spencer, Ganna Zhyrnova