Introduction
In the last article we set up a new rocky linux 8 system with the DISA stig applied using OpenSCAP. Now we’re going to cover how to test the system using those same tools, and look at what kinds of reports we can generate using the tools oscap, and its UI counterpart SCAP Workbench.
Rocky Linux 8 (and 9!) includes a suite of SCAP content to test, and remediate compliance against various standards. If you built a STIG’d system in part 1, you’ve already seen this in action. The anaconda installer leveraged this content to modify the rocky 8 configuration to implement various controls, install/remove packages, and change the way the OS level mount points work.
Over time, these things could change and you will want to keep an eye on it. Frequently, I also use these reports to show proof that a particular control has been implemented correctly. Either way, its baked in to Rocky. We will begin with some basics.
List Security Profiles
To list the security profiles available, we need to use the command oscap info provided by the openscap-scanner package. This should already be installed in your system if you've been following along since Part 1. To obtain the security profiles available:
oscap info /usr/share/xml/scap/ssg/content/ssg-rl8-ds.xml
Note
Rocky linux 8 content will use the tag “rl8” in the filename. In Rocky 9, it will be “rl9”.
If all goes well, you should receive a screen that looks something like this one:
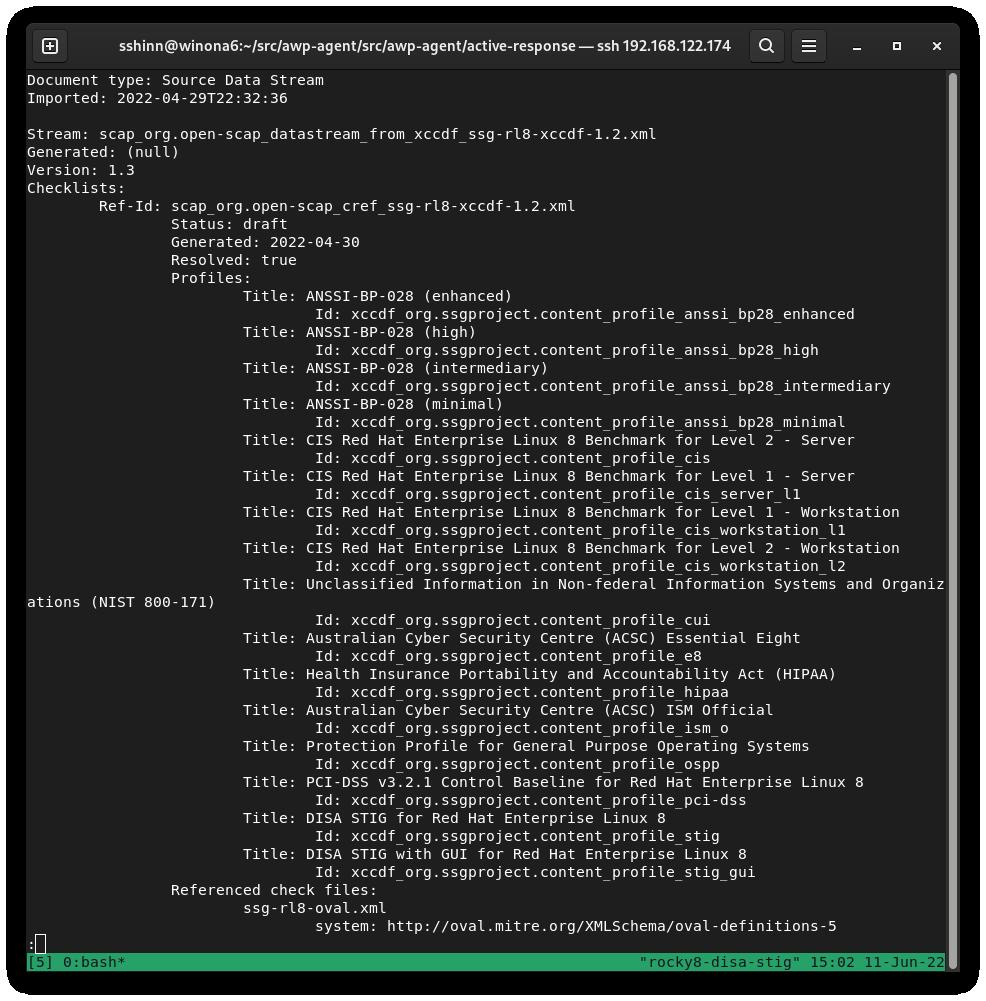
DISA is just one of many Security Profiles supported by the Rocky Linux SCAP definitions. We also have profiles for:
Auditing DISA STIG compliance
There are two types to choose from here:
- stig - Without a GUI
- stig_gui - With a GUI
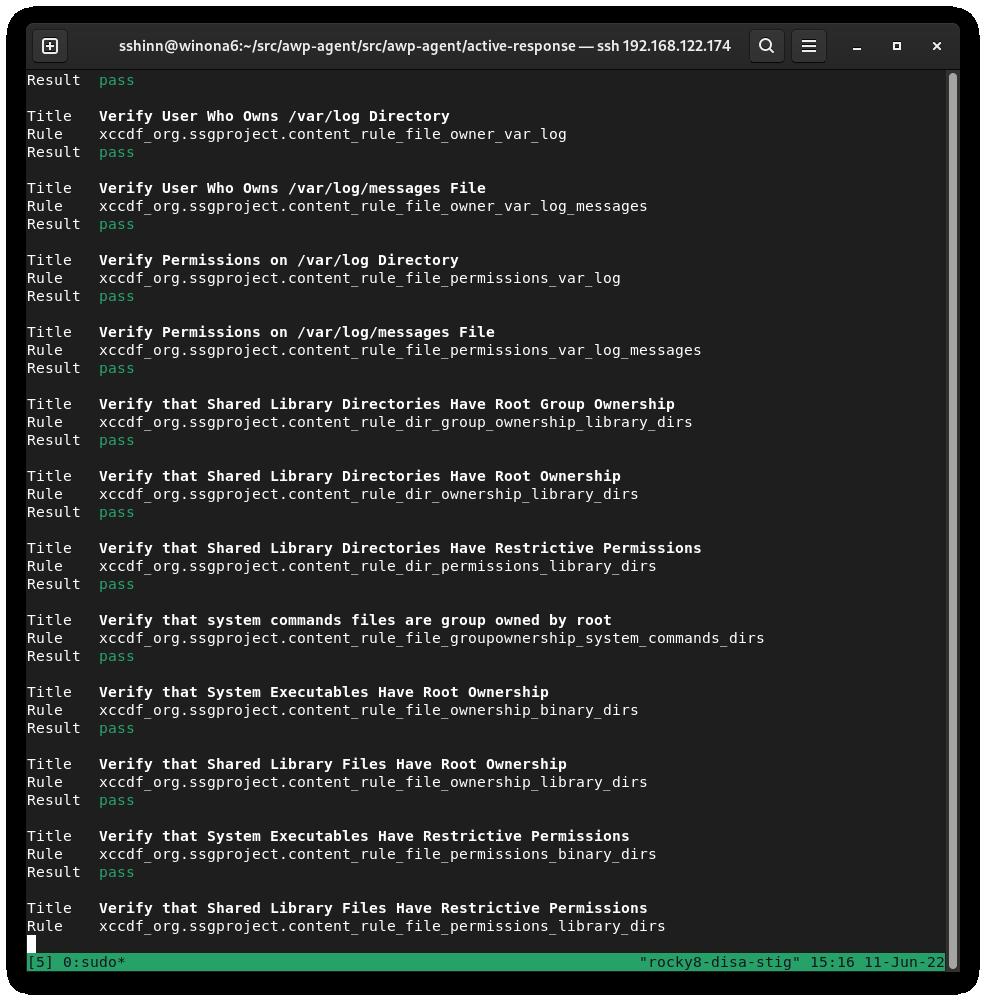
Run a scan and create an HTML report for the DISA STIG:
sudo oscap xccdf eval --report unit-test-disa-scan.html --profile stig /usr/share/xml/scap/ssg/content/ssg-rl8-ds.xml
This will result in a report like this:
And will output an HTML report:

Generating Remediation Bash Scripts
Next, we will generate a scan, and then use the results of the scan to generate a bash script to remediate the system based on the DISA stig profile. I do not recommend using automatic remediation, you should always review the changes before actually running them.
1) Generate a scan on the system:
```bash
sudo oscap xccdf eval --results disa-stig-scan.xml --profile stig /usr/share/xml/scap/ssg/content/ssg-rl8-ds.xml
```
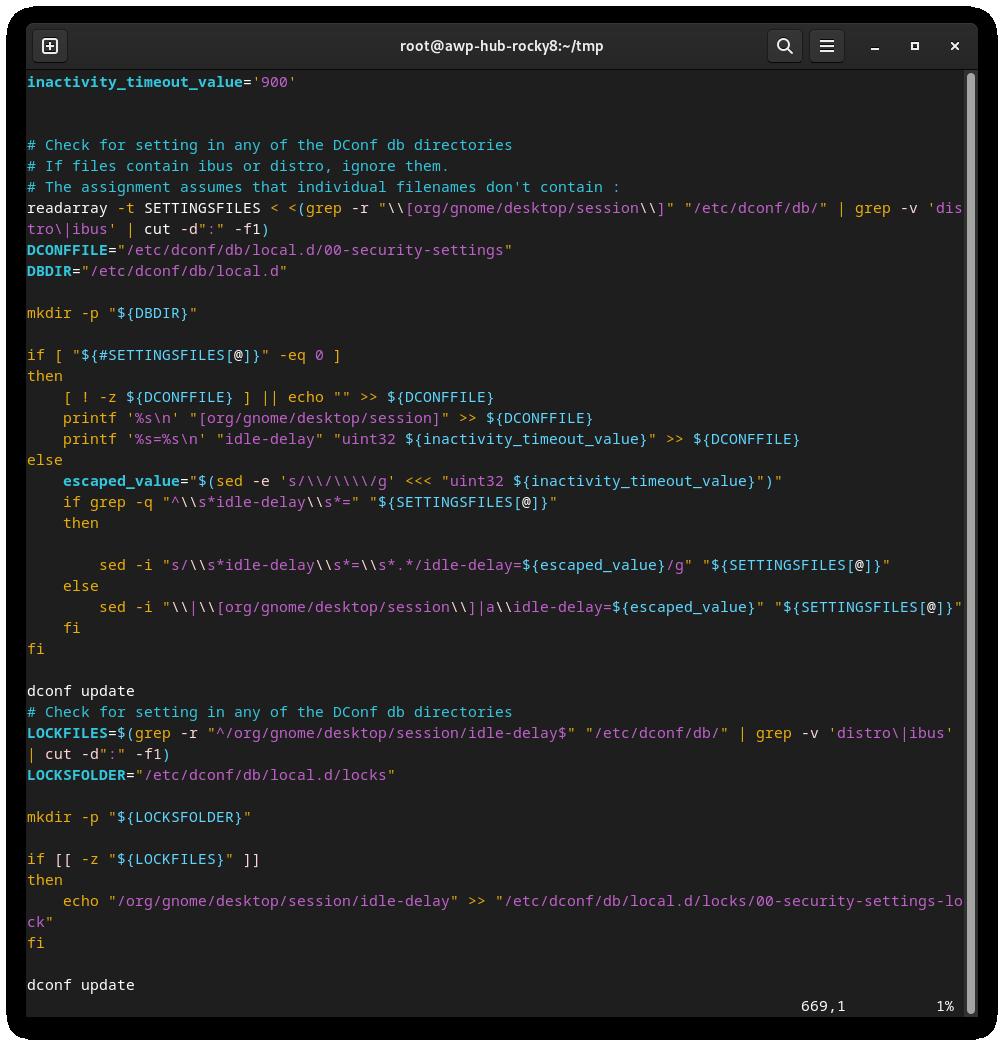
2) Use this scan output to generate the script:
```bash
sudo oscap xccdf generate fix --output draft-disa-remediate.sh --profile stig disa-stig-scan.xml
```
The resulting script will include all the changes it would make the system.
Warning
Review this before running it! It will make significant changes to the system.
Generating Remediation Ansible Playbooks
You can also generate remediation actions in ansible playbook format. Let's repeat the section above, but this time with ansible output:
1) Generate a scan on the system:
```bash
sudo oscap xccdf eval --results disa-stig-scan.xml --profile stig /usr/share/xml/scap/ssg/content/ssg-rl8-ds.xml
```
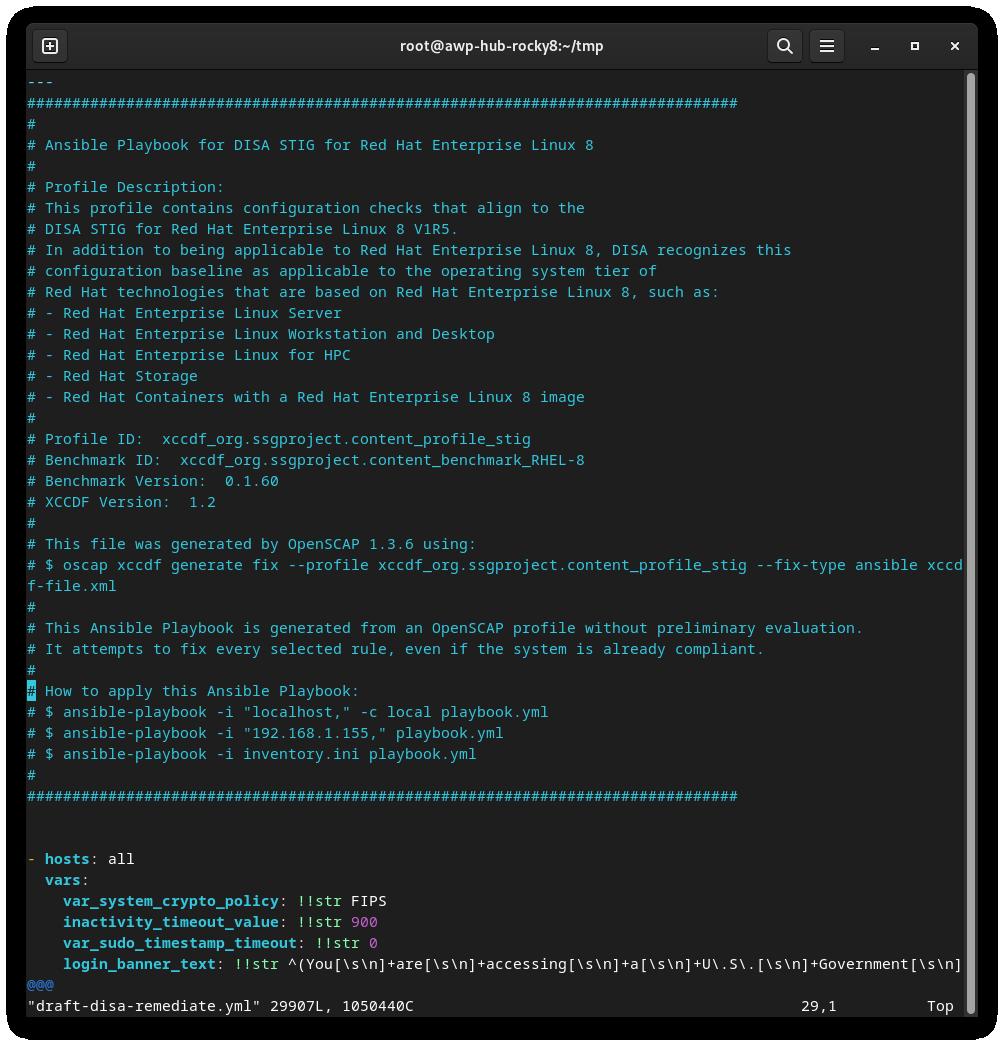
2) Use this scan output to generate the script:
```bash
sudo oscap xccdf generate fix --fix-type ansible --output draft-disa-remediate.yml --profile stig disa-stig-scan.xml
```
Warning
Again, review this before running it! Do you sense a pattern here? This verification step on all of these procedures is very important!
About The Author
Scott Shinn is the CTO for Atomicorp, and part of the Rocky Linux Security team. He has been involved with federal information systems at the White House, Department of Defense, and Intelligence Community since 1995. Part of that was creating STIG’s and the requirement that you use them and I am so very sorry about that.
Author: Scott Shinn
Contributors: Steven Spencer, Ganna Zhyrnova